NEPI Engine – Connecting a Camera to an AI Detector
Introduction
This tutorial walks through the process of connecting a USB camera to a NEPI-enabled device.
By the end of this tutorial, you will be able to:
— Access the NEPI web interface from a host computer
— Enable a USB camera, configure it’s settings, and view a live camera feed
— Enable an installed AI detection model and connect it to the camera feed
What you will need
1) 1x NEPI-enabled device and power supply.
2) 1x PC with Chrome (or Chromium) browser installed, and an Ethernet network adapter.
3) 1x Ethernet cable.
4) 1x USB camera or webcam.
Device and PC – IP Address Configuration
Configure the IP address of the your NEPI Device and PC with the following static IP configurations, which will allow them to find and communicate with each other over a network connection.
If you need step-by-step, OS-specific instructions, follow the full tutorial here: https://nepi.com/tutorials/nepi-engine-connecting-and-setup/
NEPI Device IP Address
NOTE: This step is only required if your NEPI Device is running a NEPI Lite Container installation. NEPI Full installations manage all network setting on the NEPI Device.
Set the PC computer to a static IPv4 address with the following values:
Address: 192.168.179.103
Netmask: 255.255.255.0
PC IP Address
Configure the IP address of the computer you will use to access the NEPI device so it is on the same network.
Set the PC computer to a static IPv4 address with the following values:
Address: 192.168.179.5
Netmask: 255.255.255.0
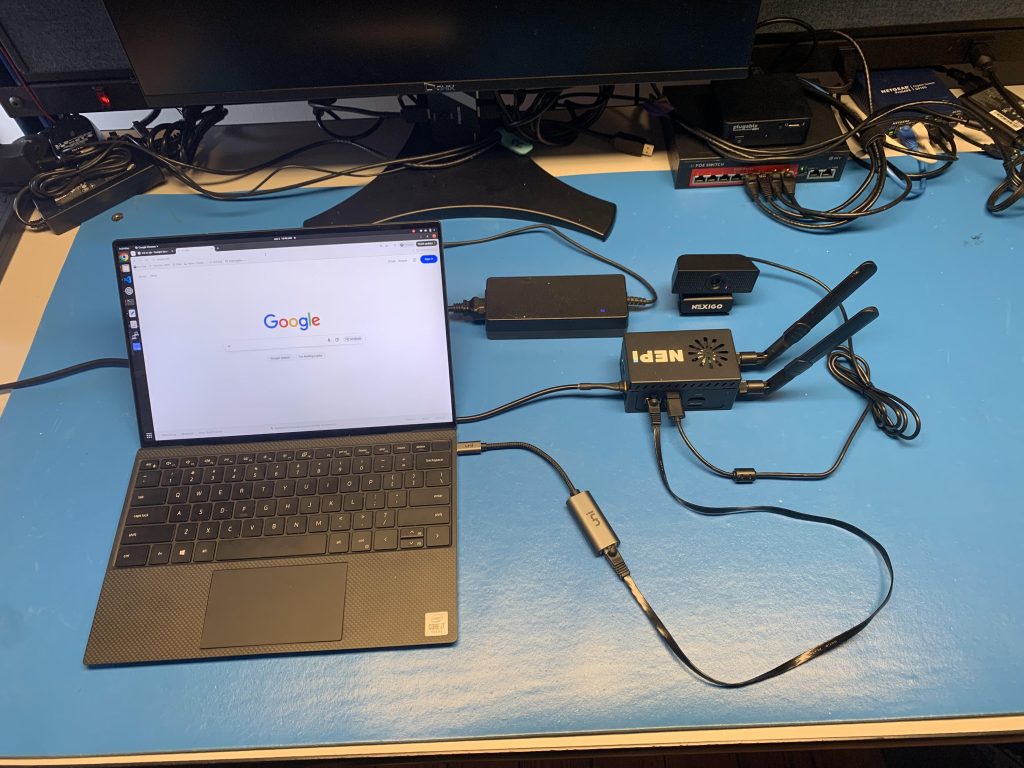
Hardware Setup
Connect your NEPI device to your PC’s Ethernet adapter using an Ethernet cable, connect a USB camera to your NEPI device, then power your NEPI device.
Configuring Camera and Running AI
1) Open a web-browser on your PC and enter the NEPI device’s IP address in the URL:
192.168.179.103:5003
You should see the NEPI RUI dashboard page appear and a blinking Green heartbeat indicator at the top of the SYSTEM STATUS section that lets you know that the RUI is communicating with the NEPI backend software processes.
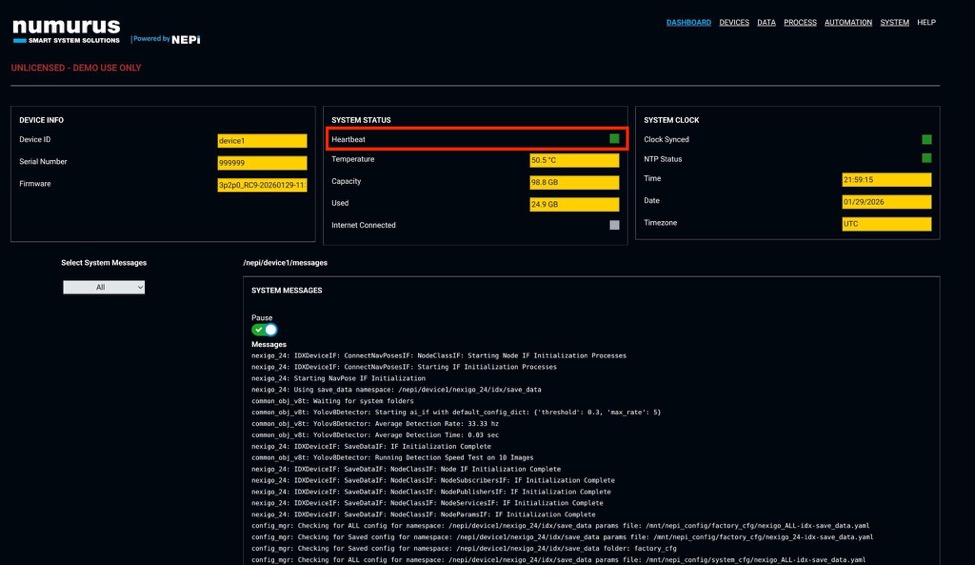
NOTE: You can come back to this page (DASHBOARD) at any time to monitor system messages
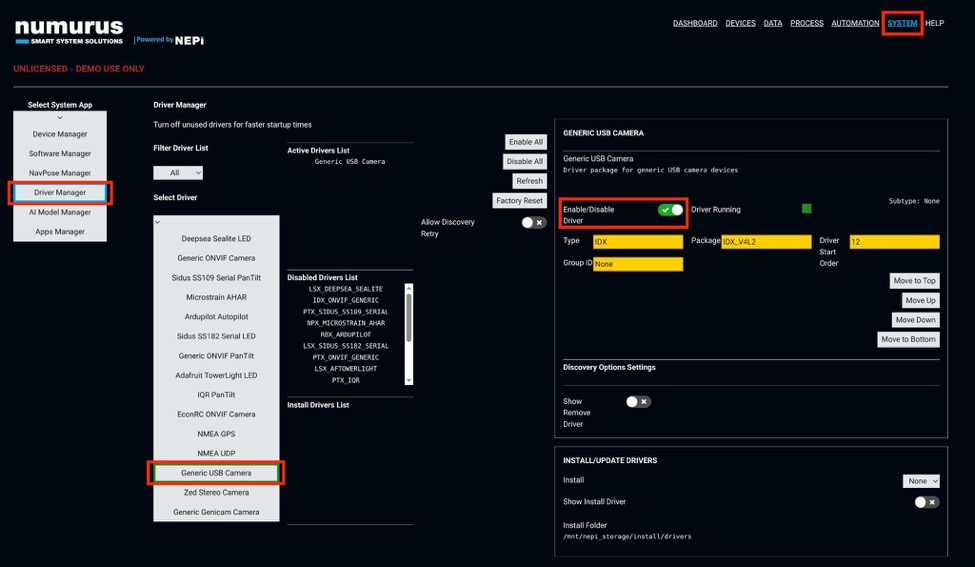
2) Enable the USB Camera driver by navigating:
— Navigate to the SYSTEM page from the top menu
— Under Select System App, choose Driver Manager
— Under Select Driver, choose USB Camera
— Enable Driver toggle
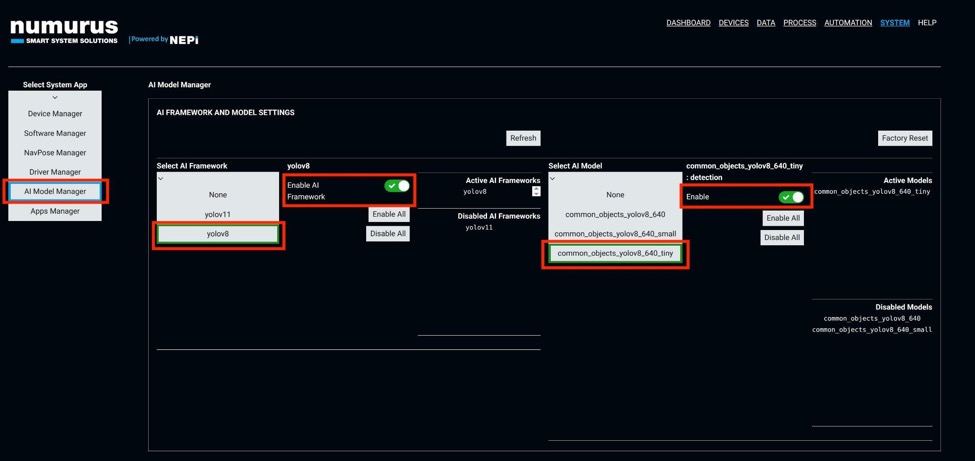
3) Enable one of the AI models that was installed during installation setup by navigating:
— Under Select System App, choose AI Model Manager
— Under Select AI Framework, choose yolo8
— Enable AI Framework toggle
— Under Select AI Model, choose common_objects_yolov8_640_tiny
— Enable toggle to the right
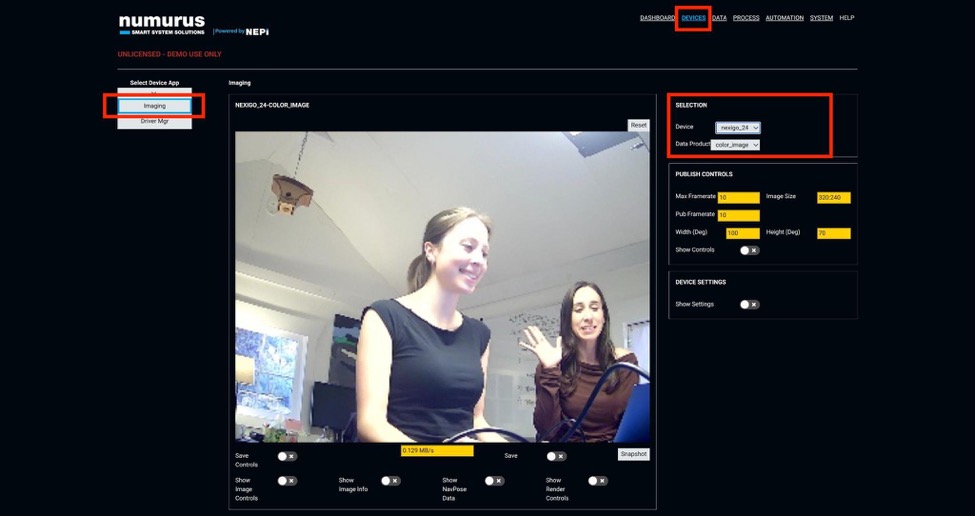
4) To access the camera controls navigate to DEVICES in the top menu then:
— Under Select Device App, choose Imaging
— Under Selection, choose your connected camera (Device) and the output type (Data Product)
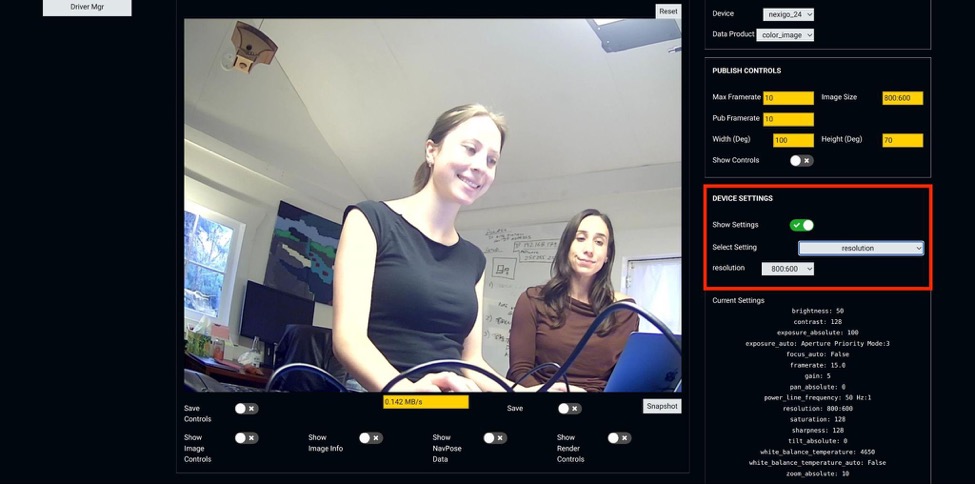
5) To change the resolution, in the DEVICE SETTINGS section toggle Show Settings then:
— Under Select Setting, choose Resolution
— Select the new resolution from the dropdown menu
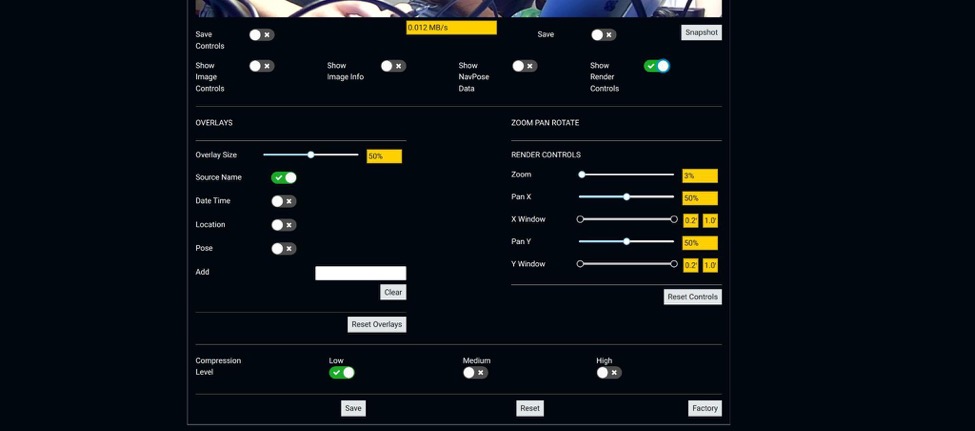
6) Scroll down to explore other control settings such as Save Controls, Set Configurations, Snapshots, and more.
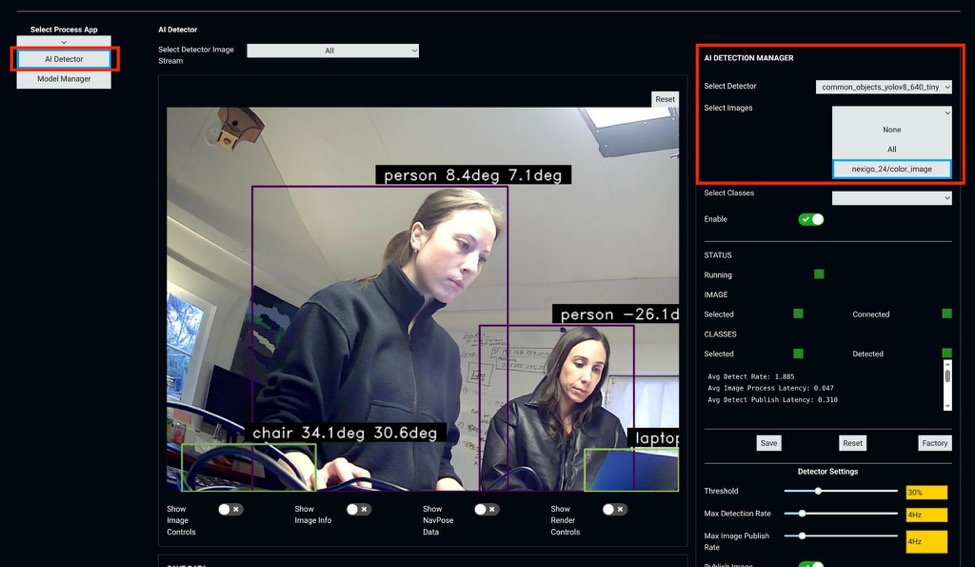
7) To connect the AI Model to the camera Feed, navigate to PROCESS in the top menu then:
— Under Select Processor App, choose AI Detector
— Under AI Detection Manager, choose the AI Model and camera feed