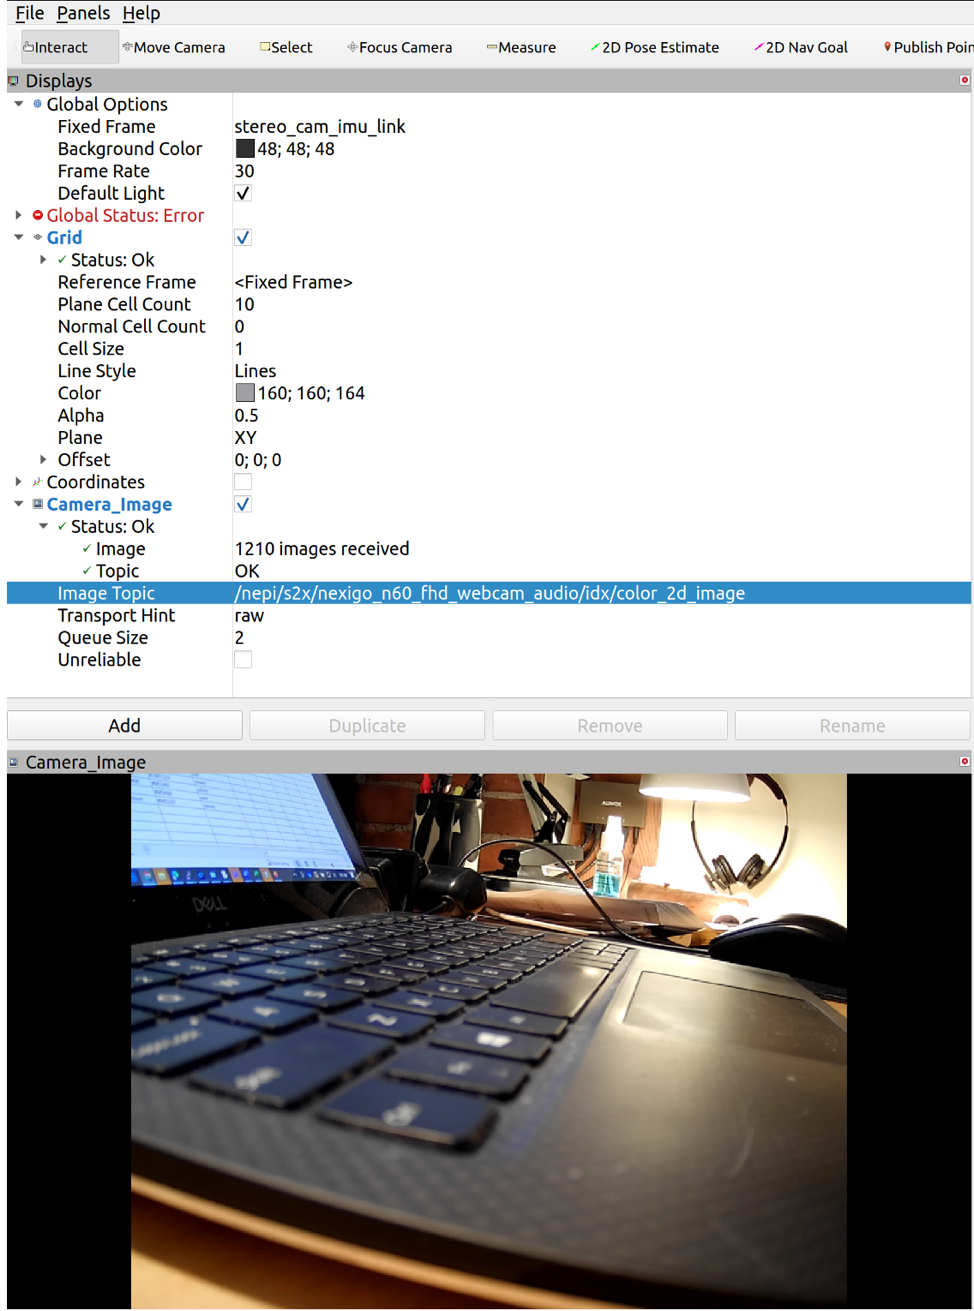
NEPI Engine – Configuring a PC for NEPI ROS Env
Introduction
This tutorial will take you through setting up your PC’s ROS installation to communicate with the ROS master running on your NEPI device. Some useful PC side ROS tools are also covered.
Useful References
– NEPI Engine – Users Manuals https://nepi.com/documentation/
– Running ROS across multiple machines http://wiki.ros.org/ROS/Tutorials/MultipleMachines
What you will need
1) 1x NEPI-enabled device with internet access. This tutorial uses an edge-compute processor box that includes an NVIDIA Jetson Xavier NX embedded GPU with NEPI Engine software installed.
NOTE: See available off-the-shelf NEPI enabled edge-compute options at: https://numurus.com/products-nepi-enabled-hardware/
2) 1x Linux PC with Ubuntu 20.04 OS configured to access the NEPI device’s RUI browser-based interface. This tutorial uses a Linux PC and a USB GigE Ethernet adapter.
NOTE: Instructions for configuration a PC and connecting to a NEPI device are provided in the NEPI Engine Getting Started tutorial at: https://nepi.com/nepi-tutorials/nepi-engine-connecting-and-setup/
Setup HOST PC for remote ROS master
1) Install ROS on your PC by following the instructions to install ROS Noetic on your Linux Ubuntu 20.04 PC available at: https://medium.com/@createwithabd/ros-noetic-installation-guide-on-ubuntu-20-04-388568d24bcf
2) Edit your PC’s bashrc file
The following environment variables must be set on your Linux PC by adding appropriate entries to your .bashrc file:
a) Open your .bashrc file with:
sudo nano ~/.bashrc
b) Add these lines to the bottom of the file:
export ROS_MASTER_URI=http://<IP Address of your NEPI device>:11311
export ROS_IP=<IP Address of your PC>
c) The factory IP address for NEPI devices is “192.168.179.103”. The recommended IP address for your PC is 192.168.179.5
c) These may vary if you setup a custom IP addresses on your PC and NEPI device press “Ctrl-x”, then “Y”, then “enter” to save and exit.
3) Edit your PC’s “hosts” file
a) The NEPI must be identifiable by hostname to your system. Add the following to your PC’s “hosts” file by opening a terminal on your PC and typing:
sudo nano /etc/hosts
b) Add the following line to your file, replacing the items in yellow with your actual system values:
<IP Address of your NEPI-enabled device> <Name of your NEPI device>
c) Example based on default Numurus S2X system settings is:
192.168.179.103 nepi-s2x
d) The factory ip address for NEPI devices is “192.168.179.103” . NEPI device is “192.168.179.103”. Your can check the name of your NEPI device opening an SSH connected terminal and copying the device name shown after the “nepi@” at the command line.

e) Press “Ctrl-x”, then “Y”, then “enter” to save and exit.
4) Add custom NEPI ROS message interfaces to your PC’s ROS system
Some of the ROS topics and services that constitute the NEPI ROS API include custom message and service types that must be known to your host device. On you PC perform the following steps for building nepi_ros_interfaces custom ROS messages and sourcing them into your environment:
a) Ensure you have “catkin-tools” installed by opening a terminal on your PC and entering:
sudo apt-get update && sudo apt-get install python3-catkin-tools
b) Download the nepi_ros_interfaces repo from the following website and selecting the “Downloads” option from the left menu bar, then selecting “Download Repository”
https://bitbucket.org/numurus/nepi_ros_interfaces/src/master/
c) Open file manager and navigate to the download folder where your downloaded zip file is located.
d) Right-click the download zip file and select the “Extract Here” option to unzip the file.
e) Right-click on the unzipped folder and select “Open in Terminal” option from menu. In the terminal window, run the following commands.
mkdir -p ~/nepi_catkin_ws/src
catkin init --workspace ~/nepi_catkin_ws
cd ..
mv numurus-nepi_ros_interfaces-c169452d3ce9 ~/nepi_catkin_ws/src/
cd ~/nepi_catkin_ws
catkin build
f) Open your .bashrc file with:
sudo nano ~/.bashrc
g) Add this line to the bottom of the file:
source ~/nepi_catkin_ws/devel/setup.bash
h) Press “Ctrl-x”, then “Y”, then “enter” to save and exit.
5) Test Your NEPI ROS Connection
Close and open a new terminal window on your PC. With a NEPI device powered up and connected to your PC over Ethernet or WiFi, test the following ROS command that lists all ROS topics available on your NEPI device:
a) First check that you can connect to remote ROS master by typing the following command in a terminal on our PC
rostopic list
b) You should see a long list of topics that look something like:
/clicked_point
/diagnostics
/initialpose
/move_base_simple/goal
/nepi/s2x/add_ip_addr
/nepi/s2x/add_ntp_server
/nepi/s2x/apply_throttle
/nepi/s2x/archive_inactive_rootfs
/nepi/s2x/automation_mgr/reset
---
c) Next, check that you can receive ROS messages from the NEPI device by typing the following command in a terminal on our PC
rostopic echo /nepi/s2x/system_status
e) You should see a long list of topics that look something like:
sys_time:
secs: 1677762215
nsecs: 426549911
temperatures: [41.0]
disk_usage: 46217.49609375
storage_rate: 0.0013020833721384406
save_all_enabled: False
info_strings: []
---
f) Learn more about the “rostopic” command and all of the available options it offers for monitoring and introspection of your NEPI ROS environment at: http://wiki.ros.org/rostopic
Debugging Suggestions
If you are having issues after setup with these test commands producing the proper output, or getting errors, here are a few steps to take:
a) Ensure your PC and NEPI device ethernet connection is working correctly by opening a terminal on your PC and typing:
ping <Your NEPI Device’s IP Address>
The factory IP address for NEPI devices is “192.168.179.103”
ping 192.168.179.103
You should see a valid connection reply like the image below

b) ensure that all of the bashrc and hosts file edits are correct on your PC and NEPI device file systems as instructed in sections 1 and 2 of this tutorial
c) Open a terminal on your PC and type:
roswtf
This should print out a number of ROS connection status messages. Look through the messages and try to find possible issues in the print out.
Additional Useful PC Side ROS Tools
1) Using ROS RQT to monitor NEPI ROS processing
a) Open a terminal on your PC and type:
rqt
This will bring up the ROS RQT application.

b) Select the Plugins/Logging/Console option from the dropdown menu.
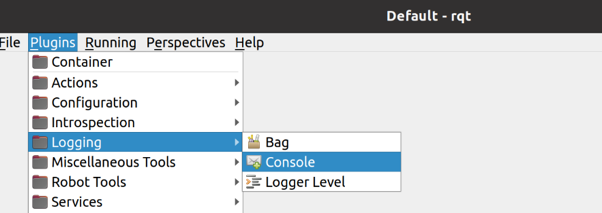
c) This will open a console monitoring window that shows all the NEPI ROS process messages in real-time. If you want to catch the ROS process message from startup, you will want to power cycle your NEPI device, open the rqt application, select the Plugins/Logging/Console option from the dropdown menu, and wait for the NEPI ROS system to load and connect. You should start to see NEPI ROS process messages once they console connects as shown below.
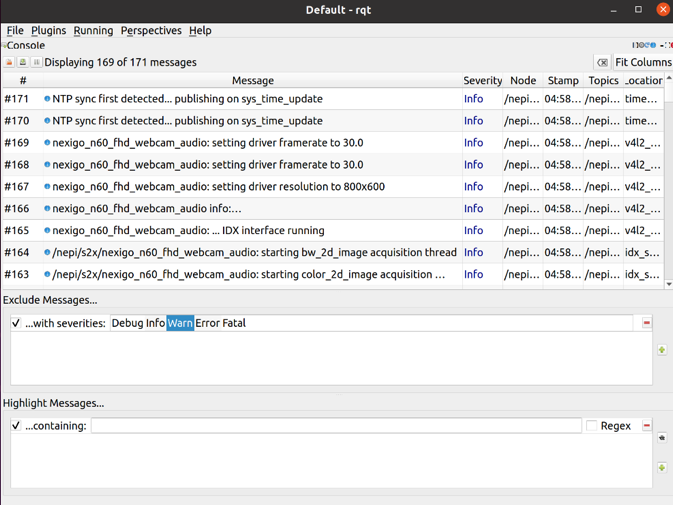
Learn more about the ROS RQT application at: http://wiki.ros.org/rqt
2) Using ROS rviz application for real-time data viewing
a) Open a terminal on your PC and type:
rviz
This will bring up the ROS RVIZ application.
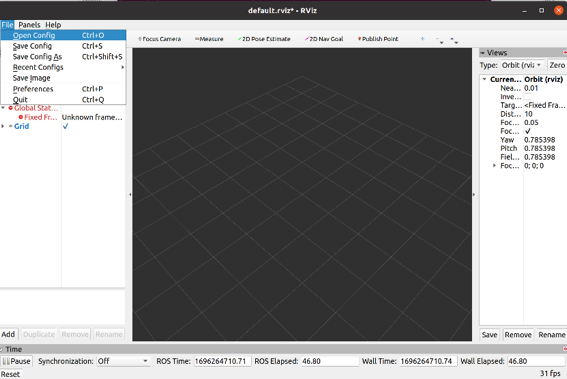
b) Either configure the rviz configuration setup yourself from within the application, or use the example 2D camera rviz configuration text provided in Appendix A of this tutorial by creating a new text document called “NEPI_2D_Cam.rviz” on your PC, pasting the rviz configuration text from Appendix A of this tutorial, saving the file, then loading your configuration by selecting the File/Open Config option from the dropdown menu and selecting your “NEPI_2D_Cam.rviz” file.
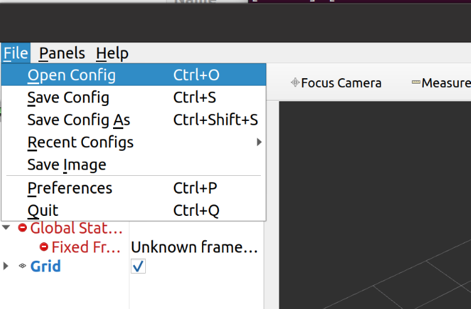
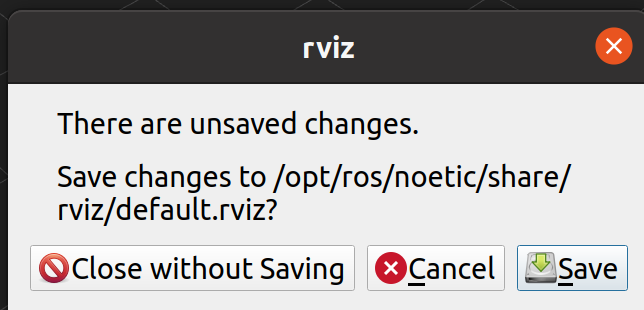
c) Choose the “Close without Saving” option
d) After loading the NEPI_2D_Cam. rviz config file, choose a valid ROS Image Topic message from the dropdown list next to the Image Topic left menu item. You should start to see images displayed in the image window below.
Appendix A – Example NEP_2D_Cam.rviz file text
Panels:
- Class: rviz/Displays
Help Height: 0
Name: Displays
Property Tree Widget:
Expanded:
- /Global Options1
- /Grid1
- /Coordinates1/Frames1
- /Camera_Image1
- /Camera_Image1/Status1
Splitter Ratio: 0.6617646813392639
Tree Height: 971
- Class: rviz/Selection
Name: Selection
- Class: rviz/Tool Properties
Expanded:
- /2D Pose Estimate1
- /2D Nav Goal1
- /Publish Point1
Name: Tool Properties
Splitter Ratio: 0.5886790156364441
- Class: rviz/Views
Expanded:
- /Current View1
Name: Views
Splitter Ratio: 0.5
- Class: rviz/Time
Name: Time
SyncMode: 0
SyncSource: ""
Preferences:
PromptSaveOnExit: true
Toolbars:
toolButtonStyle: 2
Visualization Manager:
Class: ""
Displays:
- Alpha: 0.5
Cell Size: 1
Class: rviz/Grid
Color: 160; 160; 164
Enabled: true
Line Style:
Line Width: 0.029999999329447746
Value: Lines
Name: Grid
Normal Cell Count: 0
Offset:
X: 0
Y: 0
Z: 0
Plane: XY
Plane Cell Count: 10
Reference Frame: <Fixed Frame>
Value: true
- Class: rviz/TF
Enabled: false
Filter (blacklist): ""
Filter (whitelist): ""
Frame Timeout: 15
Frames:
All Enabled: false
Marker Alpha: 1
Marker Scale: 1
Name: Coordinates
Show Arrows: true
Show Axes: true
Show Names: true
Tree:
{}
Update Interval: 0
Value: false
- Class: rviz/Image
Enabled: true
Image Topic: /nepi/s2x/nexigo_n60_fhd_webcam_audio/idx/color_2d_image
Max Value: 1
Median window: 5
Min Value: 0
Name: Camera_Image
Normalize Range: true
Queue Size: 2
Transport Hint: raw
Unreliable: false
Value: true
Enabled: true
Global Options:
Background Color: 48; 48; 48
Default Light: true
Fixed Frame: stereo_cam_imu_link
Frame Rate: 30
Name: root
Tools:
- Class: rviz/Interact
Hide Inactive Objects: true
- Class: rviz/MoveCamera
- Class: rviz/Select
- Class: rviz/FocusCamera
- Class: rviz/Measure
- Class: rviz/SetInitialPose
Theta std deviation: 0.2617993950843811
Topic: /initialpose
X std deviation: 0.5
Y std deviation: 0.5
- Class: rviz/SetGoal
Topic: /move_base_simple/goal
- Class: rviz/PublishPoint
Single click: true
Topic: /clicked_point
Value: true
Views:
Current:
Class: rviz/Orbit
Distance: 37.10993957519531
Enable Stereo Rendering:
Stereo Eye Separation: 0.05999999865889549
Stereo Focal Distance: 1
Swap Stereo Eyes: false
Value: false
Field of View: 0.7853981852531433
Focal Point:
X: 0.40499138832092285
Y: -0.015869140625
Z: 0.0008551292703486979
Focal Shape Fixed Size: true
Focal Shape Size: 0.05000000074505806
Invert Z Axis: false
Name: Current View
Near Clip Distance: 0.009999999776482582
Pitch: 1.1197961568832397
Target Frame: <Fixed Frame>
Yaw: 3.6203877925872803
Saved: ~
Window Geometry:
Camera_Image:
collapsed: false
Displays:
collapsed: false
Height: 2272
Hide Left Dock: false
Hide Right Dock: false
QMainWindow State: 000000ff00000000fd0000000400000000000005ce000007dafc0200000010fb0000001200530065006c0065006300740069006f006e000000006e000000b5000000b000fffffffb0000001e0054006f006f006c002000500072006f007000650072007400690065007302000001ed000001df00000185000000a3fb000000120056006900650077007300200054006f006f02000001df000002110000018500000122fb000000200054006f006f006c002000500072006f0070006500720074006900650073003203000002880000011d000002210000017afb000000100044006900730070006c006100790073010000006e000004390000018200fffffffb0000001800430061006d006500720061005f0049006d00610067006501000004b3000003950000002600fffffffb0000002000730065006c0065006300740069006f006e00200062007500660066006500720200000138000000aa0000023a00000294fb00000014005700690064006500530074006500720065006f02000000e6000000d2000003ee0000030bfb0000000c004b0069006e0065006300740200000186000001060000030c00000261fb0000000a0044006500700074006801000002b7000000800000000000000000fb00000016004c006500660074002000430061006d0065007200610000000186000002360000000000000000fb000000160053006f006e00610072005f0049006d006100670065010000018f0000006d0000000000000000fb0000001800430061006d006500720061005f004400650070007400680000000822000000260000000000000000fb000000160044006500700074006800200049006d00610067006500000003c2000000c00000000000000000fb0000001800520069006700680074002000430061006d0065007200610000000488000000990000000000000000fb000000160053006f006e00610072005f0044006500700074006800000005d300000275000000000000000000000001000004a7000007dafc0200000003fb0000001e0054006f006f006c002000500072006f00700065007200740069006500730100000041000000780000000000000000fb0000000a00560069006500770073010000006e000007da0000013200fffffffb0000001200530065006c0065006300740069006f006e010000025a000000b200000000000000000000000200000490000000a9fc0100000001fb0000000a00560069006500770073030000004e00000080000002e1000001970000000300000e700000005efc0100000002fb0000000800540069006d0065010000000000000e70000006dc00fffffffb0000000800540069006d00650100000000000004500000000000000000000003e3000007da00000004000000040000000800000008fc0000000100000002000000010000000a0054006f006f006c00730100000000ffffffff0000000000000000
Selection:
collapsed: false
Time:
collapsed: false
Tool Properties:
collapsed: false
Views:
collapsed: false
Width: 3696
X: 144
Y: 54


