NEPI Engine – Custom AI Model Training
Introduction
This tutorial covers creating custom AI detection models for Yolo based frameworks. The process has been tested with both YoloV8 and YoloV11 models
The tutorial covers:
A) Setting up the ai training environment
B) Creating a custom model training project
C) Training a custom ai yolo image detection model
D) Testing the custom model
E) Retraining the custom model
NOTE: An example AI training project for the LightBulb detector example used in this tutorial can be downloaded from: https://www.dropbox.com/scl/fi/a6z2atk6eg2161ntozolc/yolov8_lightbulb_detection_training.zip?rlkey=op2g01fnc37osmyels3v2fu1c&st=k8tn9zdv&dl=0
One-Time Environment Setup
Follow the instructions in this section to setup an AI training environment on your training computer
REQUIREMENTS
- A Linux computer (or NEPI enabled processor) with internet access
- Python3 with pip installed
NOTE: These instructions were tested on an NVIDIA Jetson Orin NX with ubuntu 20.04 and python 3.8.10
NOTE: These instructions could be adapted for a Windows or Mac PC
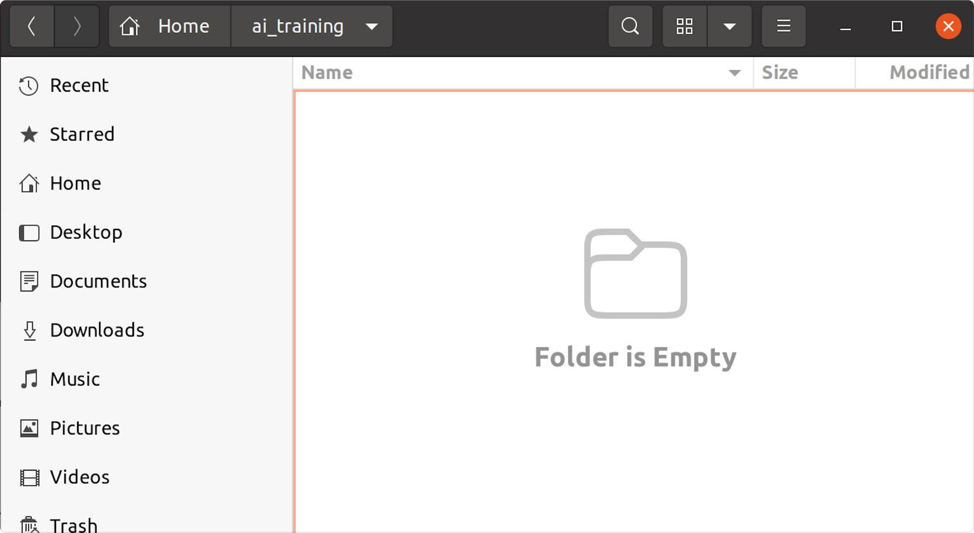
1) Create an ‘ai_training’ folder for your AI training projects in a folder on the Linux computer you want to train on:
Example: mkdir ~/ai_training
NOTE: If you are training on a NEPI enabled system: make sure your are training on the NEPI device’s user storage SSD drive, and not in the NEPI file system’s ~/ai_training folder, which has limited space. There is an existing ‘ai_training” folder on the user storage drive at: /mnt/nepi_storage/ai_training. You can jump to this folder by typing ‘train’ from any terminal on your NEPI device.
2) Clone nepi_ai_training repository
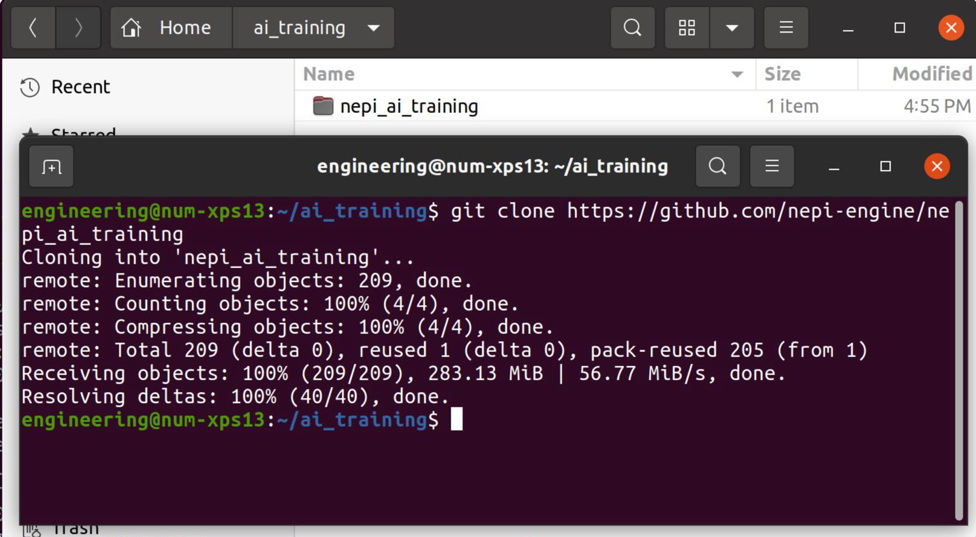
Make sure your device is connected to the internet clone the nepi_ai_training repo to the ‘ai_training’ folder from git clone: https://github.com/nepi-engine/nepi_ai_training
Example:
cd ~/ai_training
on a NEPI device, just type ‘train’ to change to the user ai_training folder default NEP sudo password: nepi
3) Install the python requirements
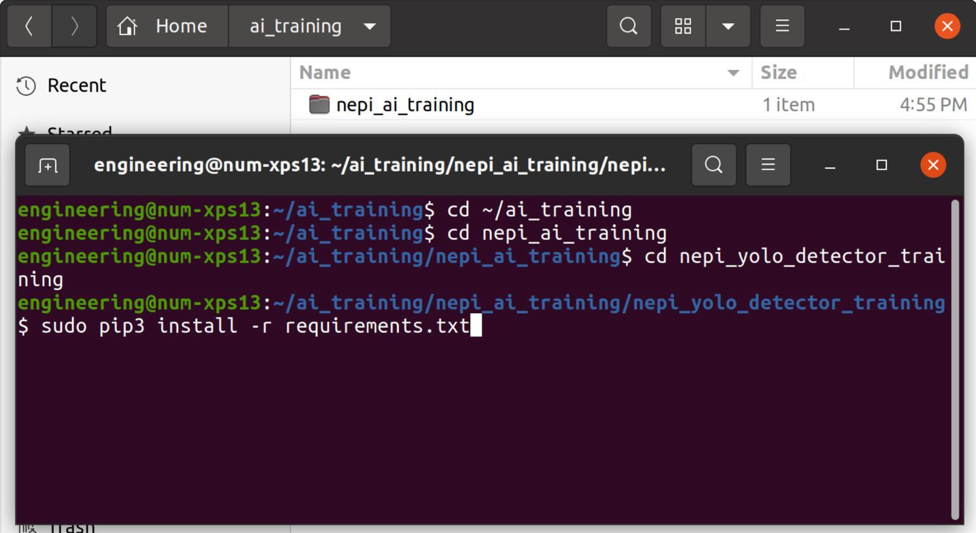
Change to the AI model framework folder in the nepi_ai_training repo you want to train on (i.e. ‘yoloV8’). Then use pip to check/install any missing python packages that are required for that framework.
cd nepi_yolo_detector_training
sudo pip3 install -r requirements.txt
NOTE: If you are training on an Intel xpu, also run pip install intel-extension-for-pytorch
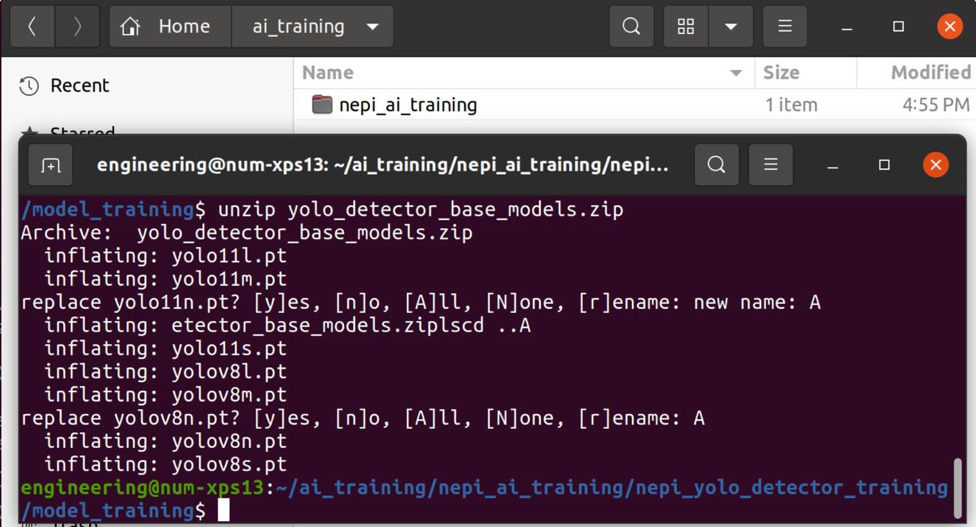
4) Install additional base model files
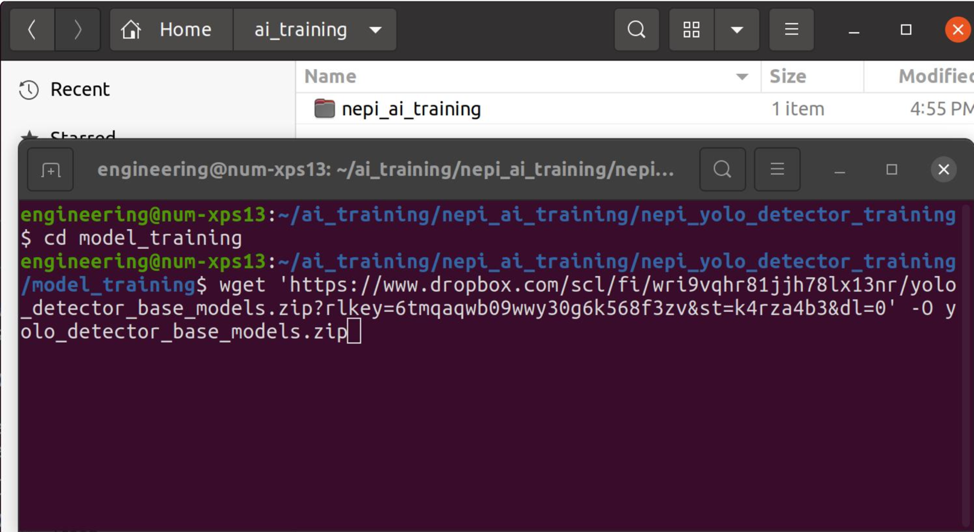
The nepi_ai_training repo includes two small yolo base models yolov8n.pt (nano) and yolov11n.pt (nano), but you can download additional models that include small, medium, and large versions of these base models for more accurate (but slower and higher resource) models.
cd model_training
wget 'https://www.dropbox.com/scl/fi/wri9vqhr81jjh78lx13nr/yolo_detector_base_models.zip?rlkey=6tmqaqwb09wwy30g6k568f3zv&st=k4rza4b3&dl=0' -O yolo_detector_base_models.zip
unzip yolo_detector_base_models.zip
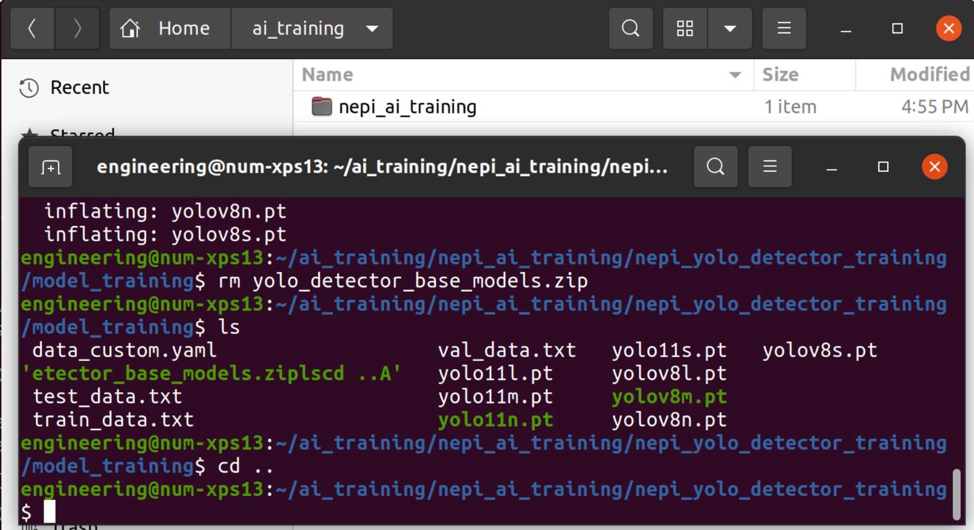
rm yolo_detector_base_models.zip
ls
cd ..
NOTE: Find information on the different start model options at this link: https://docs.ultralytics.com/tasks/detect/#models
One-Time Project Folder Setup
1) Edit and run the ‘project_setup.sh’ script
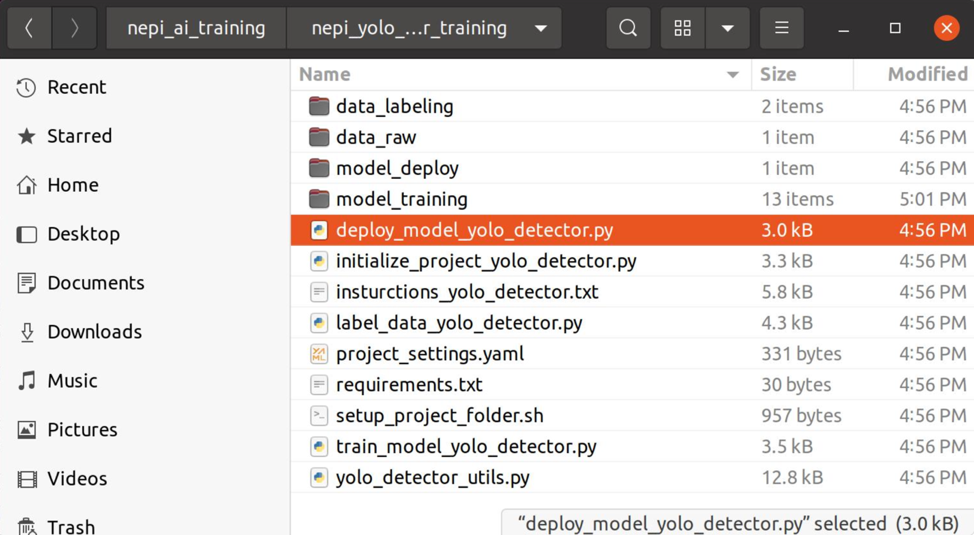
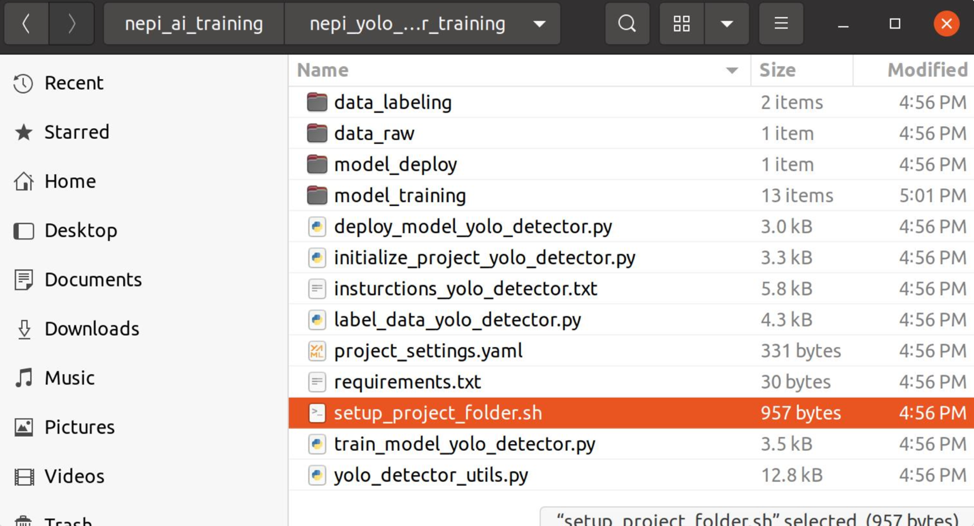
In the ‘nepi_yolo_detector_training’ folder, open the ‘project_setup.sh’ file.
nano setup_project_folder.sh
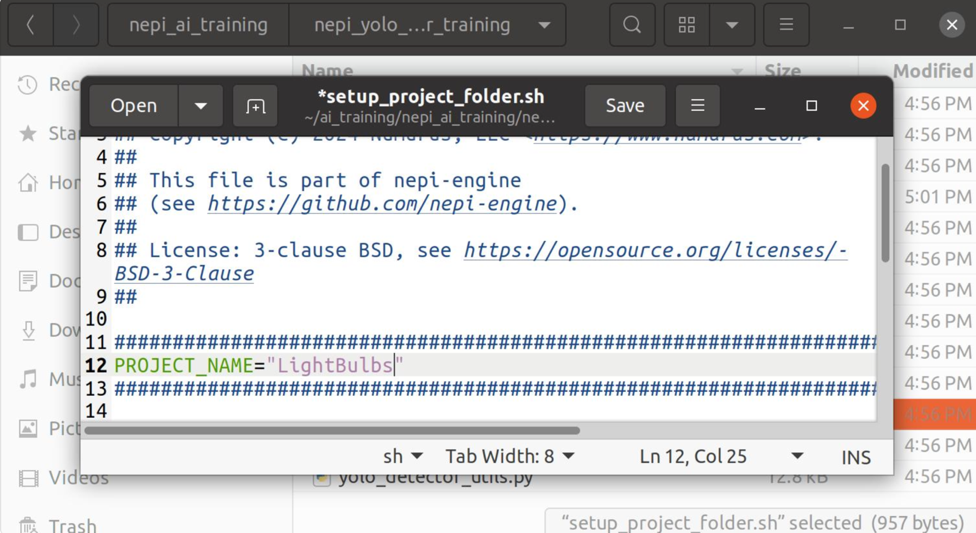
2) Set the ‘PROJECT_NAME=‘ variable to the folder name you want for your project
Example: PROJECT_NAME=”LightBulbs“
3) Save the file
4) Run the script
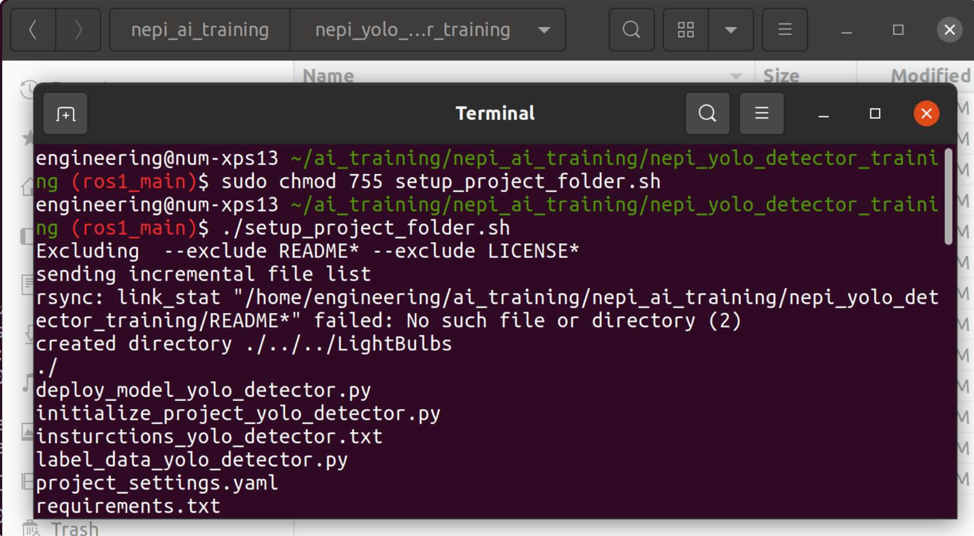
Open terminal in the same folder and run
sudo chmod 755 setup_project_folder.sh
./setup_project_folder.sh
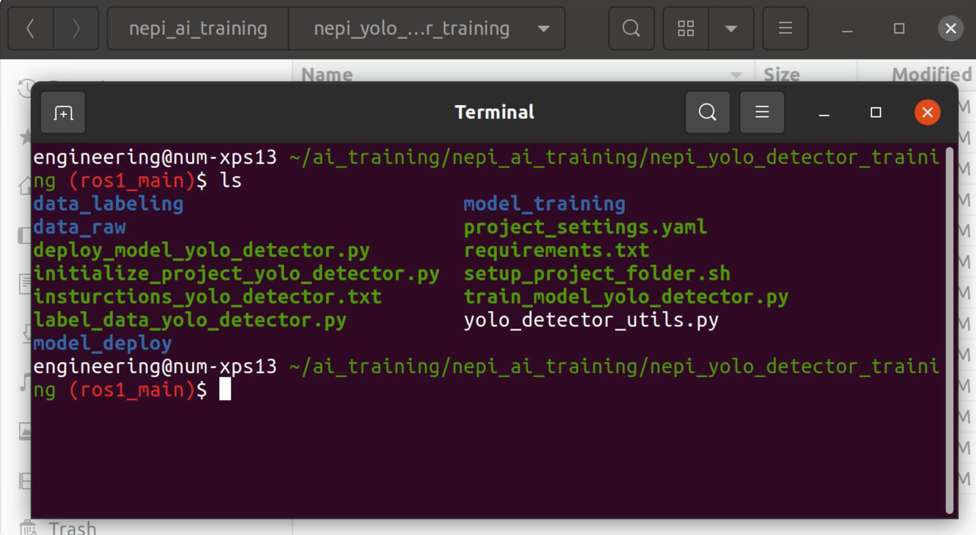
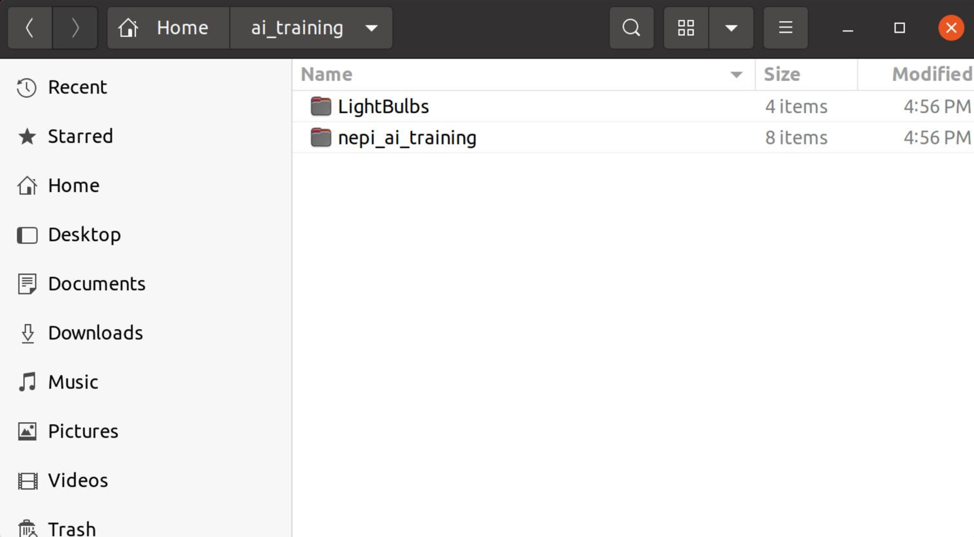
cd ./../../${PROJECT_NAME}
ls
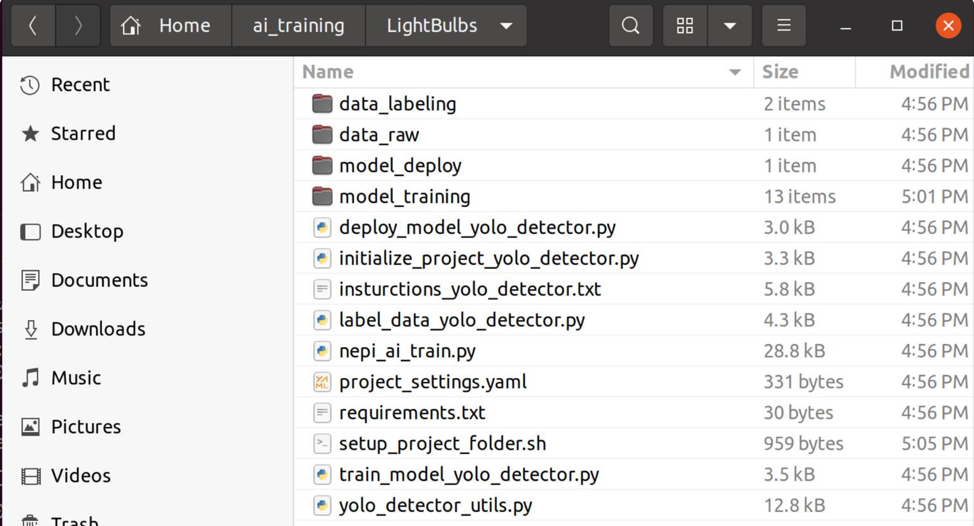
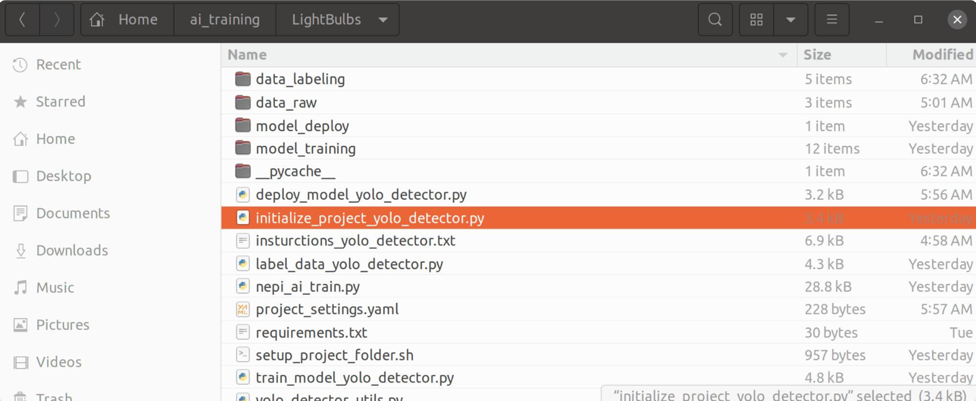
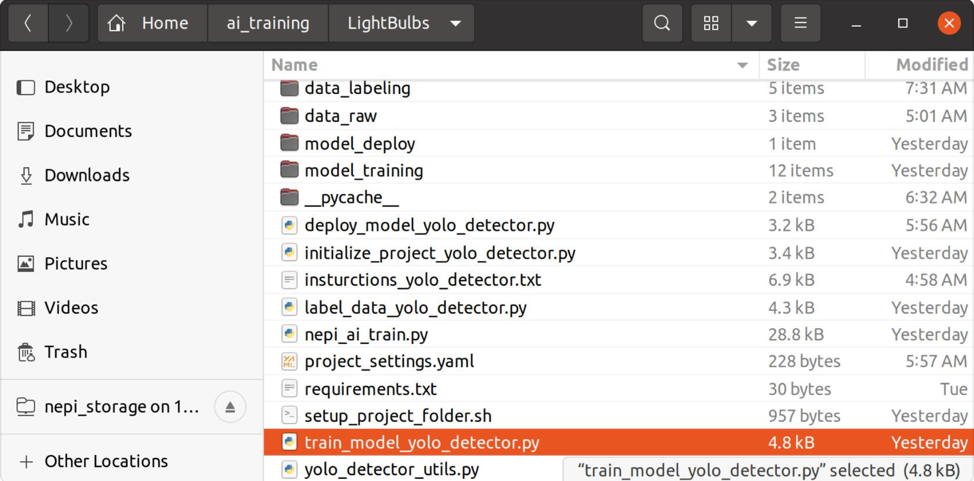
You should see a number of files transferred from the ‘nepi_yolo_detector_training’ folder
Project Initialization
This section walks through setting up your AI model training project, configuring the model parameters, and preparing raw image data for labeling and training.
1) Edit the project settings file
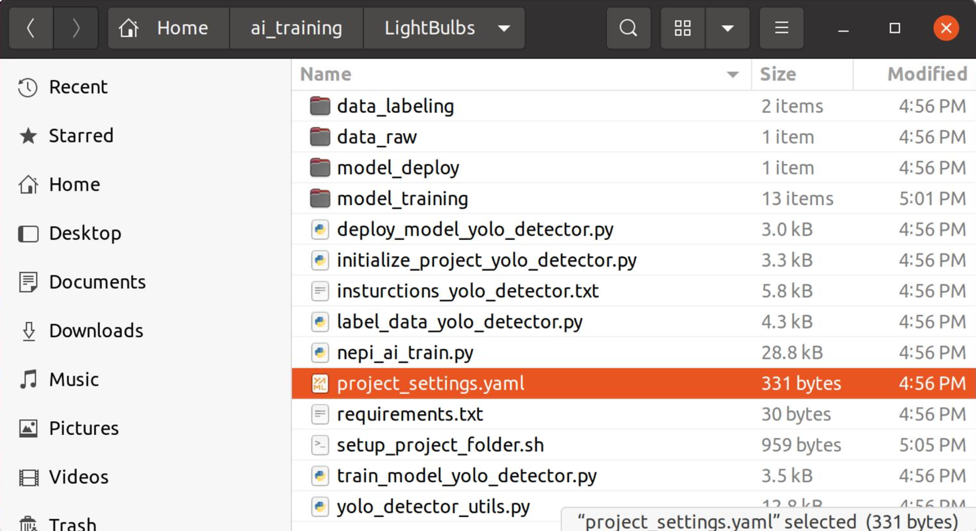
Navigate to the base project folder containing the project python scripts and the ‘project_settings.yaml’ file. Update the following fields:
A) ‘MODEL_NAME’: Set this to your desired model name.
B) ‘DESCRIPTION’: Add a description for your model’s purpose.
C) ‘CLASSES: Enter the list of class labels to use for labeling/training under the ‘ line. Each label should be on its own line proceeded by a ‘ – ‘
NOTE: You can change these values anytime, remove labels, or add labels and rerun the ‘initialize_project.py’ script in the next section.
NOTE: Do not change the order of classes after running the ‘initialize_project.py’ script.
D) ‘USE_PERCENT_DATA’: Set the value to adjust the percentage of image files transferred from the ‘data_raw’ folders to use for labeling/training data.
NOTE: You can increase this value at any time without losing your existing labeled data files.
E) ‘RANDOM_DATA_SIZE’: (Optional) If you would like to create a random set of images to test with initially, set the field to the number of random test images you want to work with.
F) ‘BASE_MODEL’: Select a starting model from the ‘model_training’ folder to use for your first training session
NOTE: Additional training sessions will use the last best model in the ‘model_training’ folder as the start model
Find information on the different start model options at this link: https://docs.ultralytics.com/tasks/detect/#models
G) ‘USE_BEST_MODEL’: Set to false to start training from the set ‘BASE_MODEL’, rather than an existing ‘best.pt’ created during the previous training session.
NOTE: If you change the ‘BASE_MODEL’ after training with a different base_model, then you will need to set this to false to reset the model source
H) ‘IMAGE_SIZE’: Change value to change the models native image size that input images will be resized to during training and live detection processing
NOTE: While increasing this value will provide better detections on smaller image targets it comes at a significant increase in detection time/latency
I) ‘NUM_EPOCHS’ and ‘BATCH_SIZE’: Change values to adjust the training session parameters
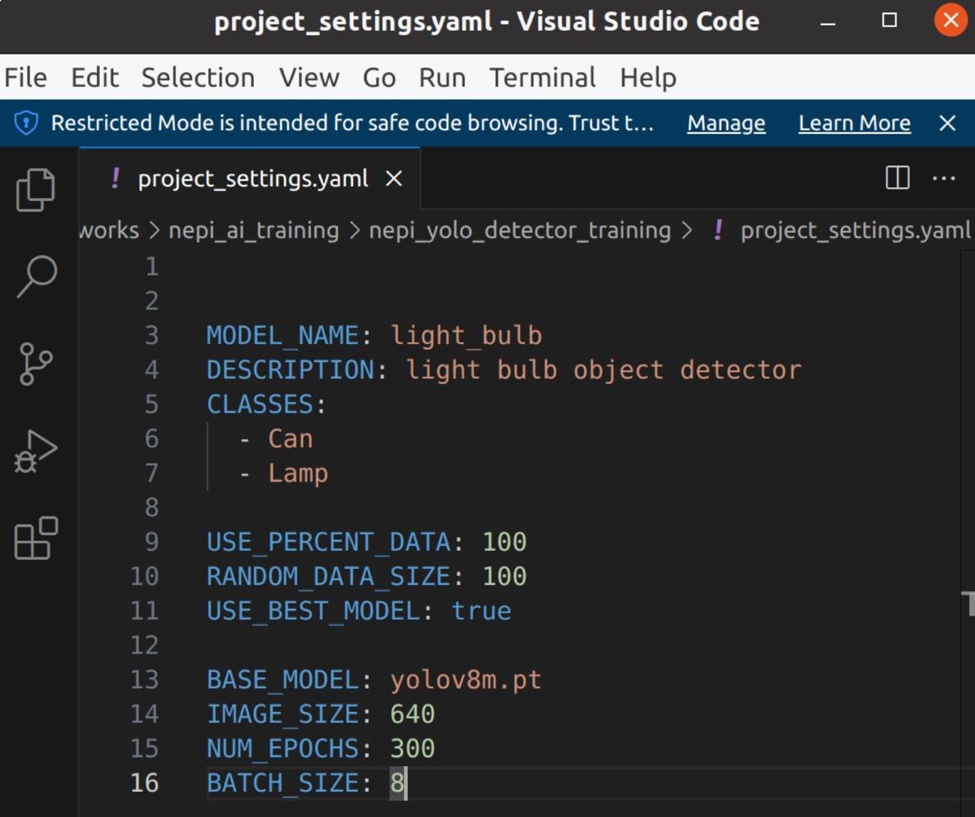
Example: ‘project_settings.yaml’
MODEL_NAME: light_bulb
DESCRIPTION: light bulb object detector
CLASSES:
- Can
- Lamp
USE_PERCENT_DATA: 100
RANDOM_DATA_SIZE: 100
USE_BEST_MODEL: true
BASE_MODEL: yolov8m.pt
IMAGE_SIZE: 640
NUM_EPOCHS: 300
BATCH_SIZE: 8
2) Run the project initialization python script.
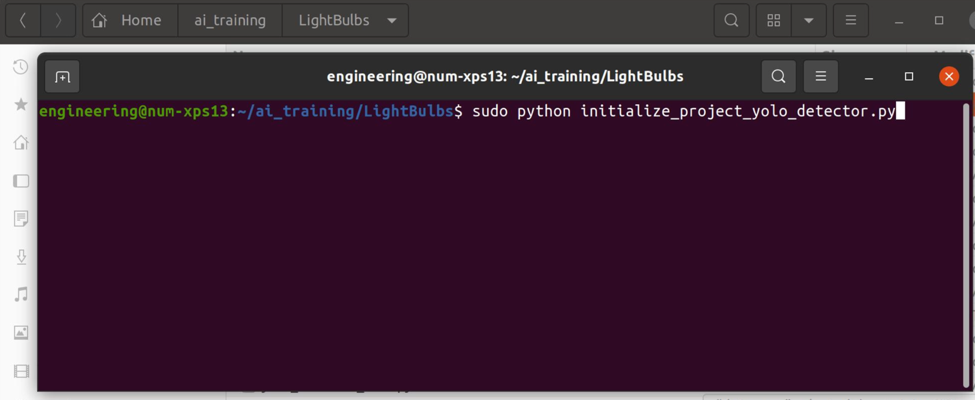
After saving the settings file, open a terminal in your project folder and run:
sudo python initialize_project_yolo_detector.py
You should see a number of files transferred from the ‘nepi_yolo_detector_training’ folder
The script performs the following processes:
1) The script will populate the labeling data folder from data in the raw data folder and check any existing label files against the classes in the ‘project_settings.yaml’ file.
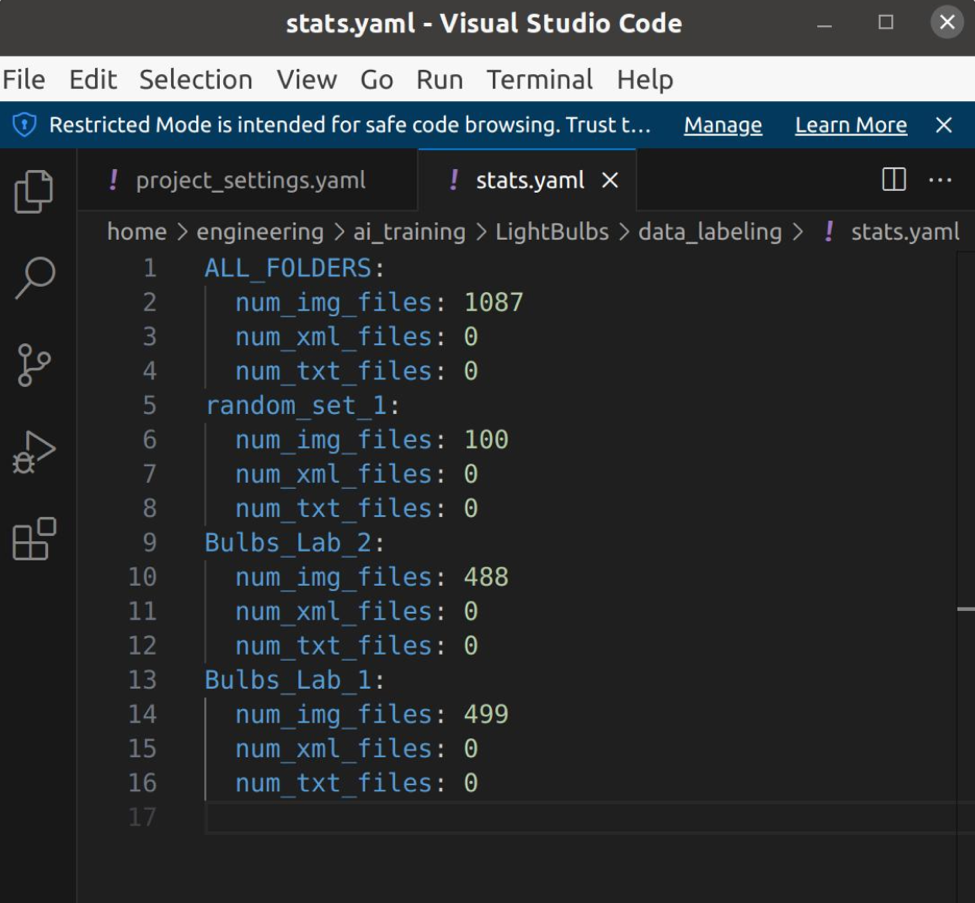
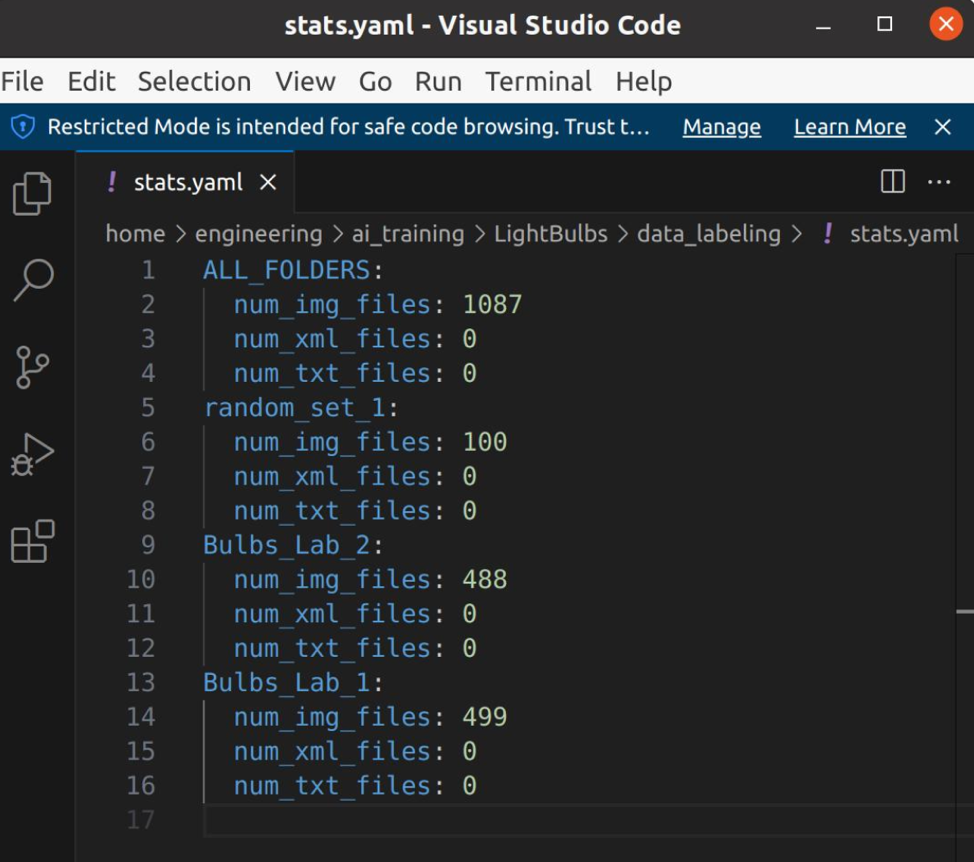
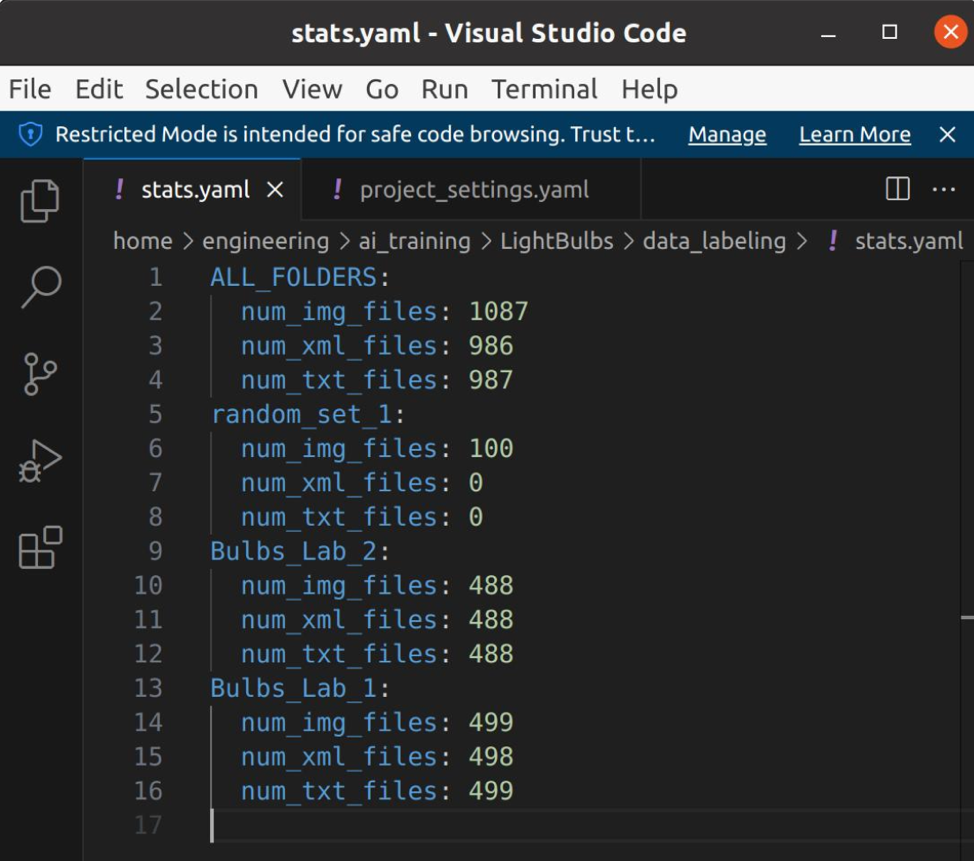
2) Updates the ‘stats.txt’ files for data folders with folder data information
3) Fixes permissions of project files and folders
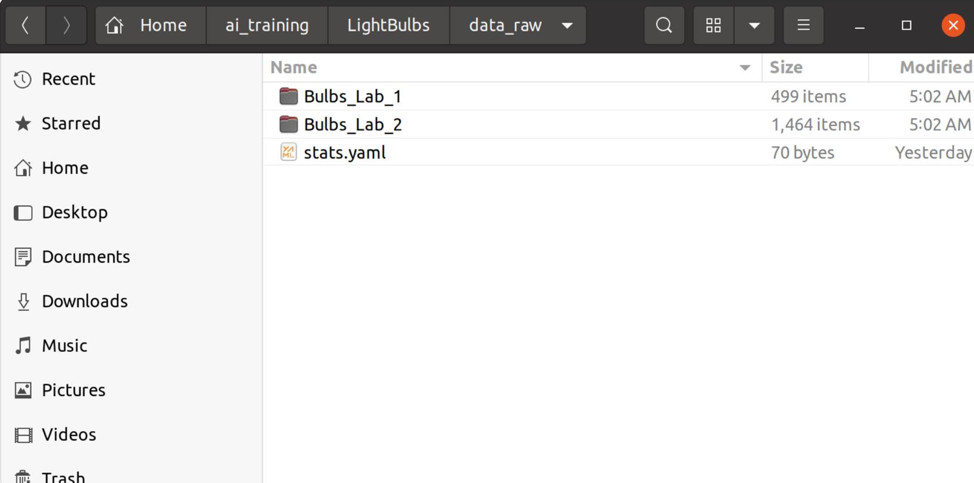
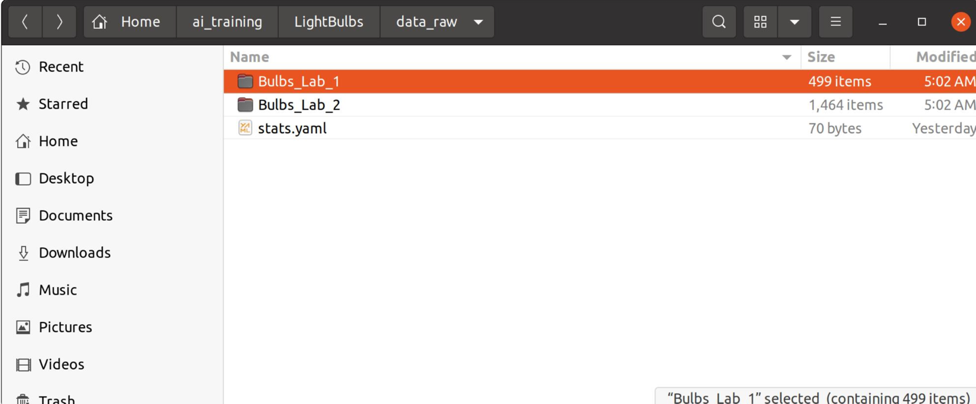
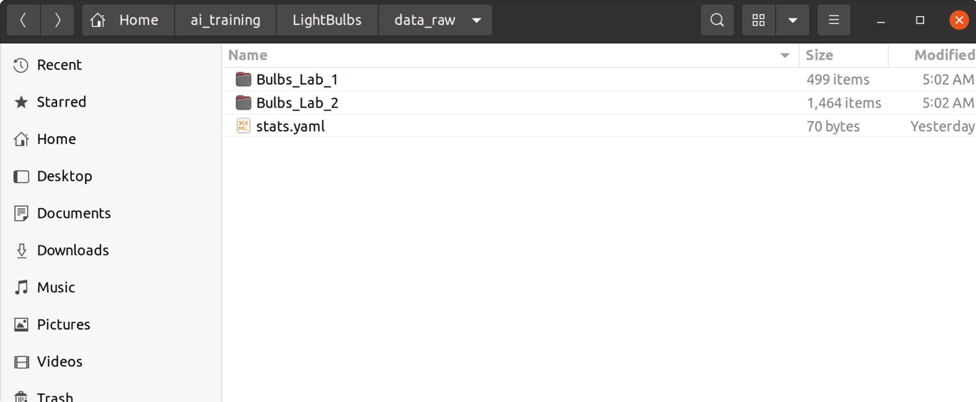
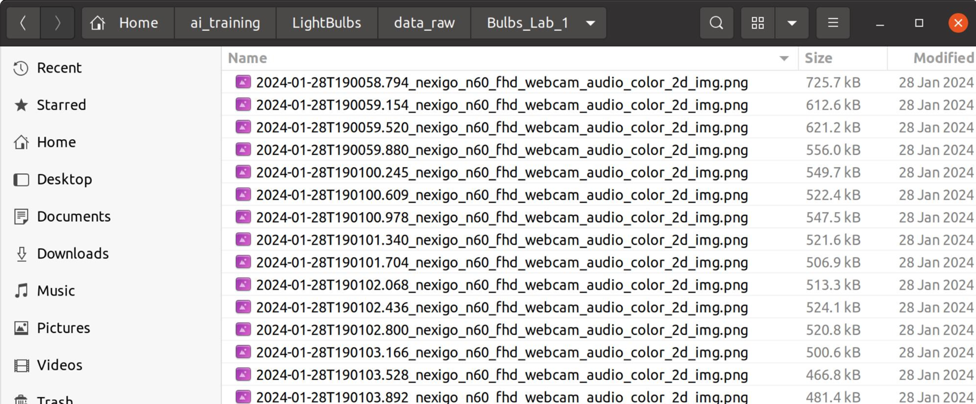
3) Populate the raw data folder with image file folders.
Add folders that include the image files you want to use for training to the project’s ‘data_raw’ folder. Supported image file types: .jpg, .JPG, .jpeg, .png, .PNG
NOTE: Put images in subfolders in the ‘data_raw’ folder, not directly in the data_raw folder
NOTE: If you have images with existing label files (xml or txt), add to the folders that include the corresponding image files. These label files will be copied to the labeling data folder during the project initiation step in the next section.
4) Run the project initialization script (Optional)
If you add new data or update classes, re-run:
sudo python initialize_project_yolo_detector.py
NOTE: This script should be run when:
1) New data is added to the raw data folder
2) Any changes to the ‘CLASSES‘ label list in the ‘project_settings.yaml’ file.
NOTE: It is recommended to run through the remaining label, train, deploy, test processes using the random data set produced to test and familiarize the processes before trying to process all the data.
Label Data
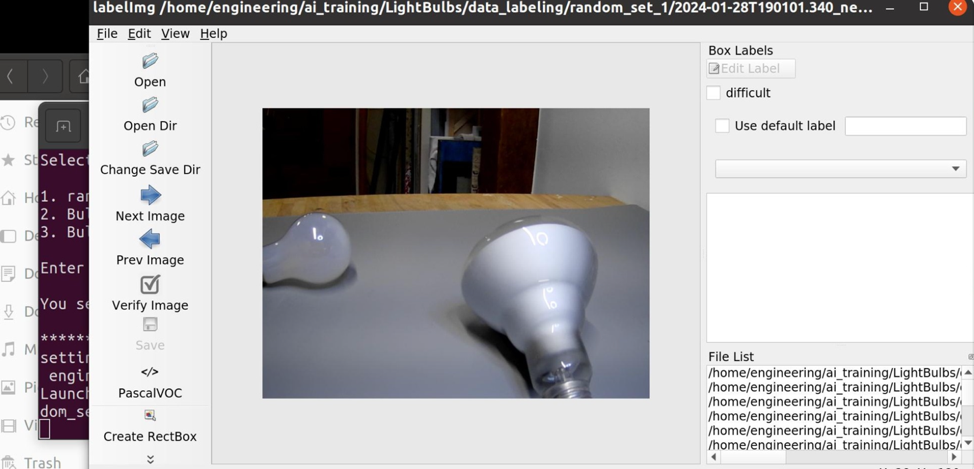
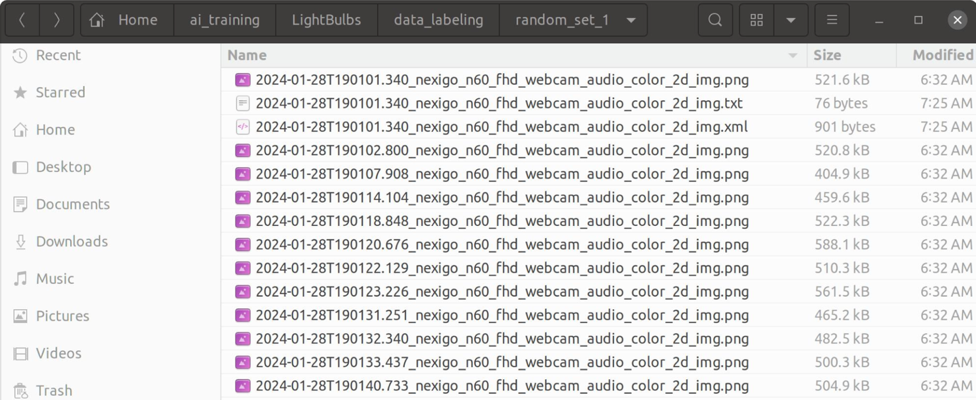
Once your project is initialized and raw image data is organized, you’ll use the labelImg tool to annotate your data with bounding boxes for each target object class.
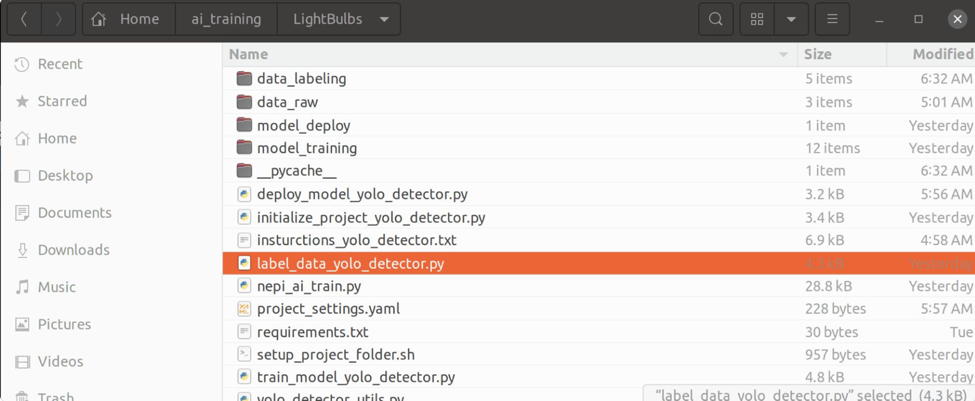
1) Run the data labeling script
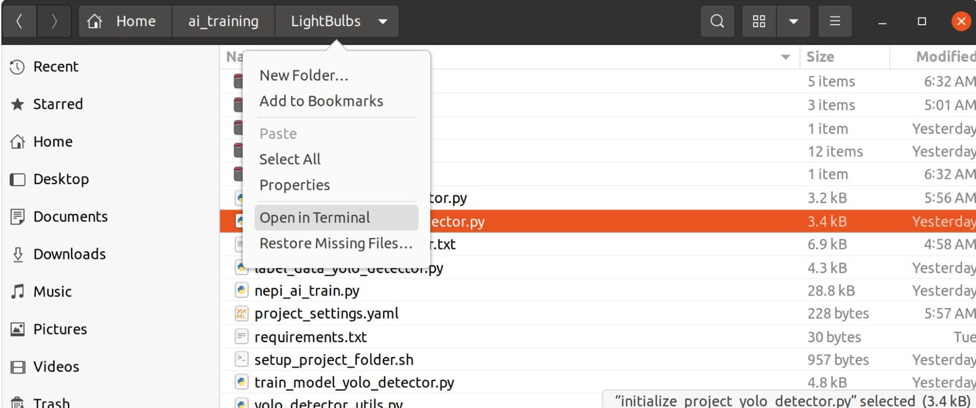
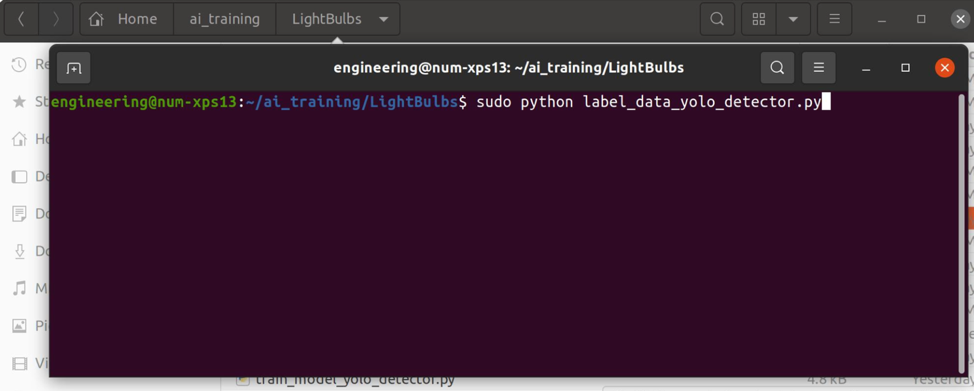
Navigate to the base project folder containing the project python scripts. Open a terminal and run the following command:
sudo python label_data_yolo_detector.py
Script Processes:
- Fixes permissions of project files and folders
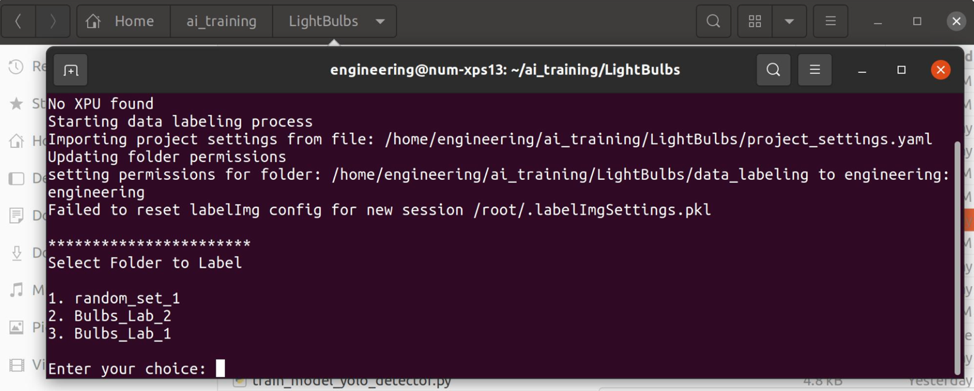
- Prompts user to select the data labeling folder for the current session
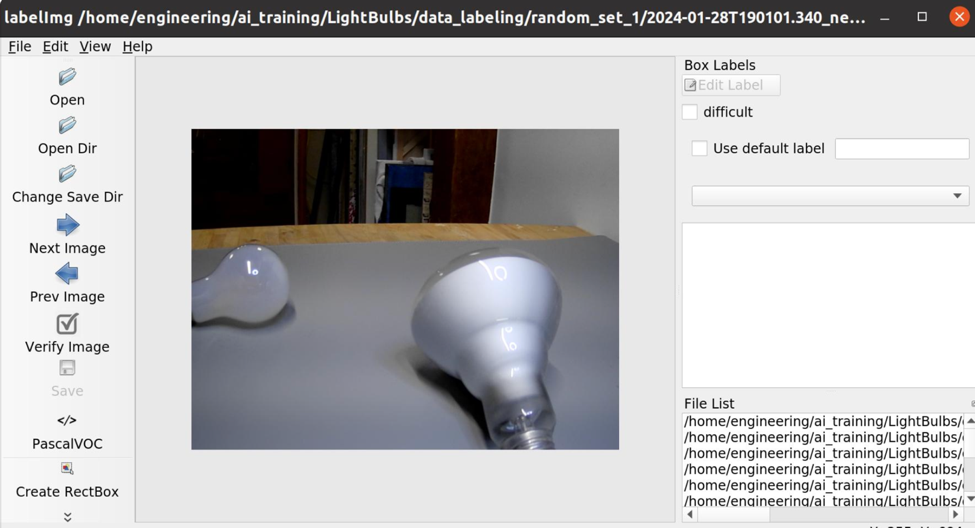
- Starts the ‘labelImg’ application for the selected data labeling folder
- Checks any label files against the classes in the ‘project_settings.yaml’ file.
- Creates ‘txt’ label files from the ‘xml’ label files created
- Updates the ‘stats.txt’ file for data labeling folders with folder data information
When to Run This Script:
- After initializing your project
- For each folder in the data labeling folder
- When making updates or corrections to existing labels
- After adding new data and re-running the ‘initialize_project.py’ script
2) Configure the labeling session
Select the data labeling folder from the prompted list, which will open a labelImg session in the selected data labeling folder.
Set labelImg session configuration:
A) Under the ‘View’ menu item: enable the ‘Auto Save Mode’ and ‘Single Class Mode’ options
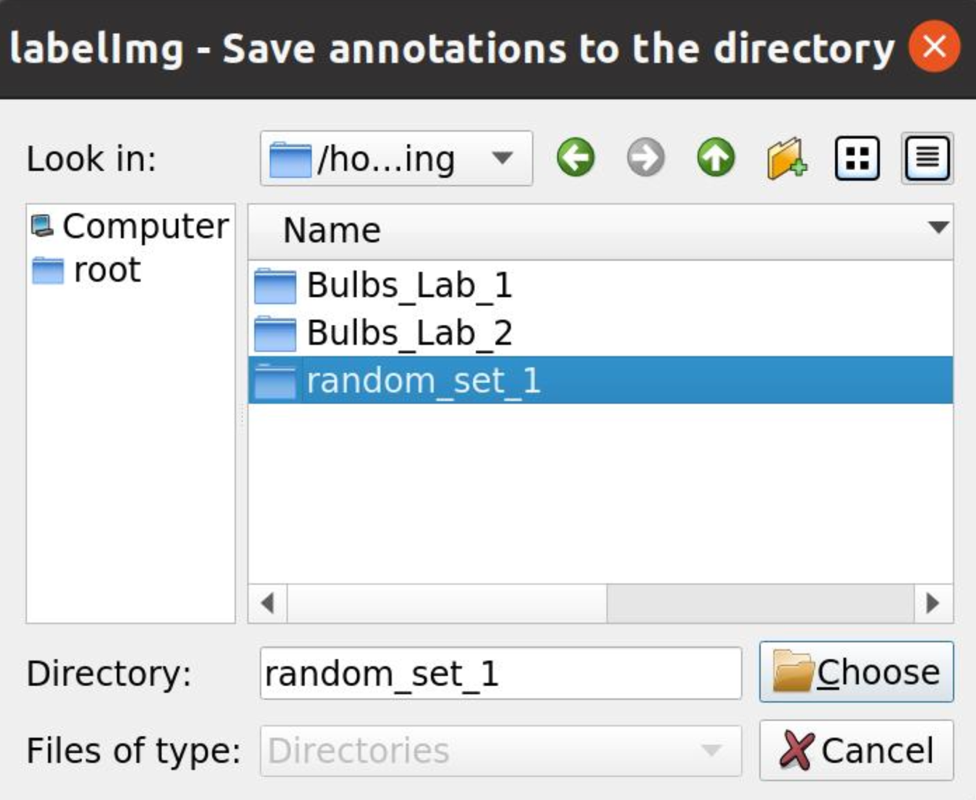
B) Under the ‘File’ menu item, select the ‘Change Save Directory’ option and select the session image folder in the project’s ‘data_labeling folder’
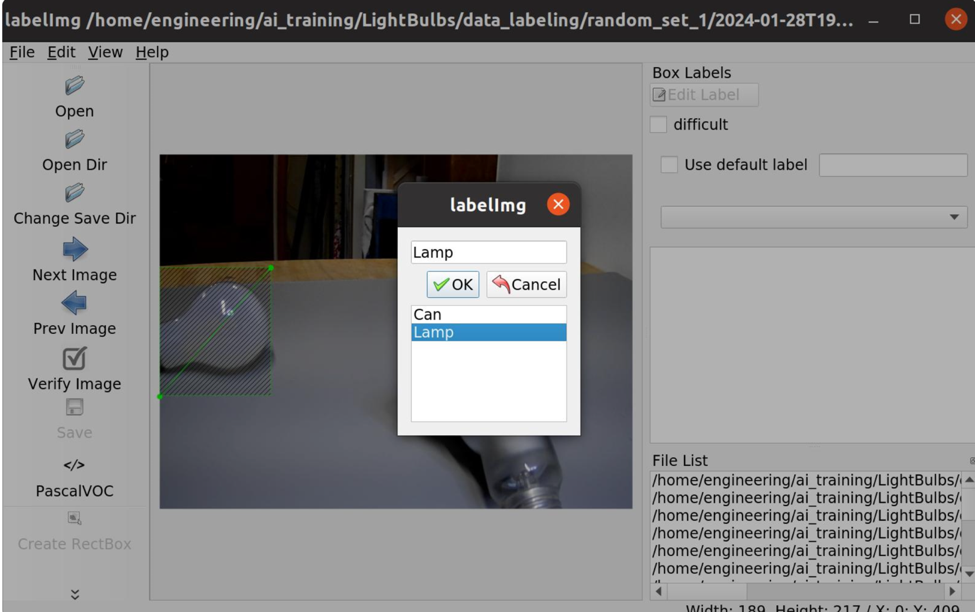
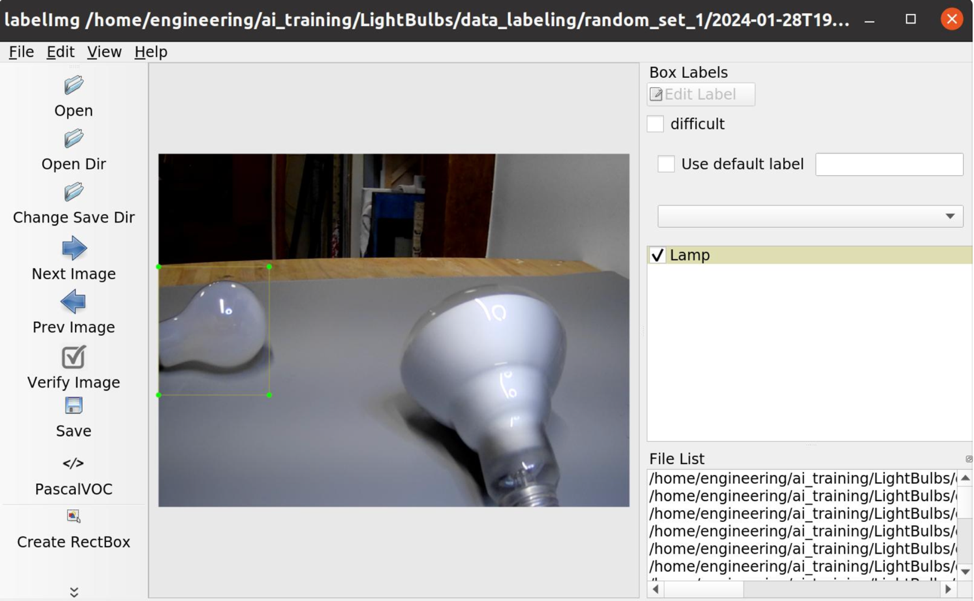
C) Click the ‘Create RectBox’ from the sidebar, drag mouse over object to label, then select the label class from the popup menu.
D) Run through all the data in the folder using the selected label.
E) Repeat the process for each class label, by turning off the ‘Single Class Mode’, labeling the a target with the next class label, then turning back on the ‘Single Class Mode’
F)When complete, close the application.
Keyboard Shortcuts: Using the following hot-keys can speed up the process significantly:
- ‘W’ for creating a new label box
- ‘d’ next image
NOTES:
- Verify Labels Are Saving: Check early to ensure your ‘.xml’ label files are being saved in the correct folders.
- Check Progress: You can check the stats of the image and label files in the ‘stats.txt’ file in the data labeling folder
- Backups: When label updates are made, the original ‘.xml’ file is saved as ‘.xml.org’ for reference.
Train Model
Once your data is labeled, you’re ready to train the custom object detection model.
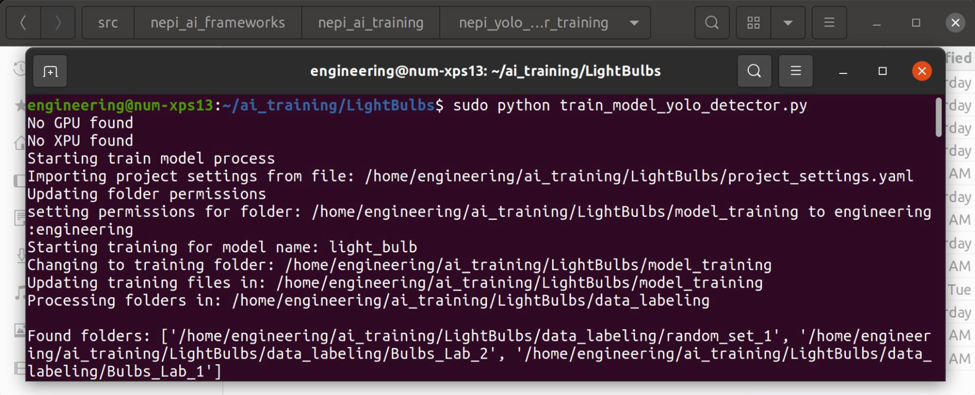
1) Run the model training script
Navigate to the base project folder containing the project python scripts. Open a terminal and run the following command:
sudo python train_model_yolo_detector.py
NOTE: Training will run until:
- The model reaches low enough loss score on the test data
- The model runs through the set number of Epochs
- You hit “Ctrl=C” to stop the training session
NOTE: You can rerun this script to retrain the last best model if additional data has been labeled to improve your mode.
Script Processes:
- Fixes permissions of project files and folders
- Creates (or updates) the train, val, test image lists used for training
- Starts a model training session using values set in the ‘project_settings.yaml’ file
- Fixes permissions of project files and folders
Create Deploy Model
After training, create a deployment-ready model package.
1) Run the deploy model script
Navigate to the base project folder containing the project python scripts. Open a terminal and run the following command:
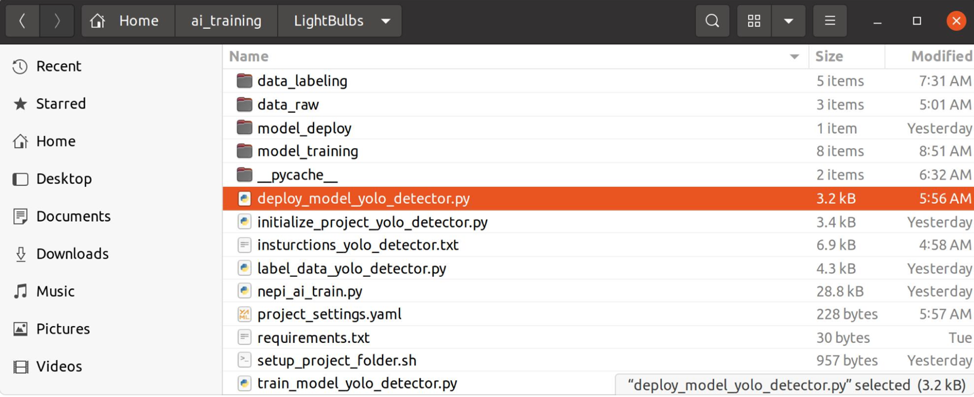
sudo python deploy_model_yolo_detector.py
NOTE: If the script found a trained model in the training folder, you should now see three files in the ‘model_deploy’ folder:
1) ‘.py’ weights file
2) ‘.yaml’ model info file
3) ‘.txt’ result file
Script Processes:
- Fixes permissions of project files and folders
- Searches the model training folder for the latest ‘best.pt’ trained weights file and results file, and copies them to the model deploy folder renamed to the model name + base_model + image size
- Creates a corresponding ‘.yaml’ model info file with the same name
- Fixes permissions of project files and folders
NOTE: You should rerun this script after every training session to create the latest best model deployment package
Deploy and Test Model
Once you have a deployed model, you’re ready to test it live using your NEPI device. In this section you will copy your custom model to the NEPI device’s ai_models library, enable your model one the NEPI AI Model Manager page, connect your model to a live camera stream (or test using image/video files stored on the NEPI storage drive with one of NEPI’s built in File Pub applications), enable and test your model’s performance
1) Copy the files from the projects’ model deploy folder to the appropriate AI framework folder on your NEPI device’s ‘ai_models’ user folder
Example: YOLOv8 models should be copied to the folder:
/nepi_storage/ai_models/yolosv8
2) Restart your NEPI Device
3) Enable your model in the NEPI RUI:
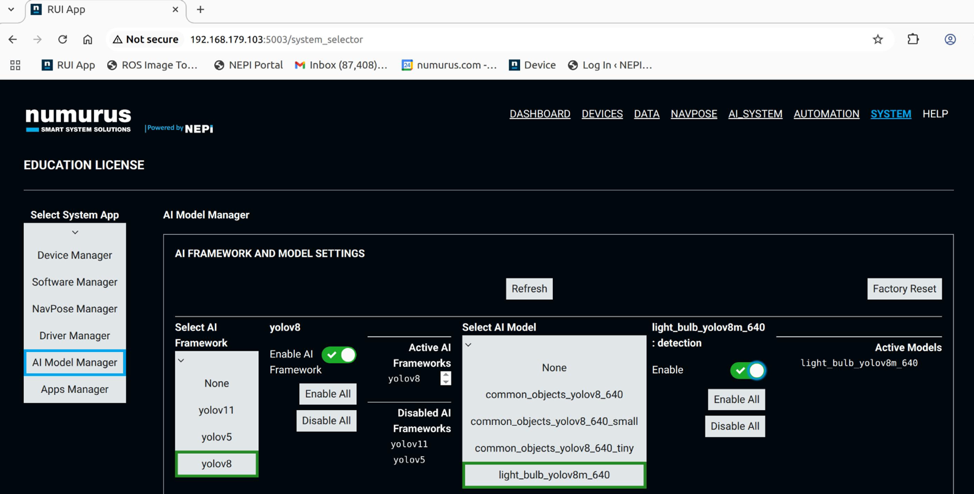
- Open the RUI System/AI Model Manager page
- Enable the framework and new custom model if not already enabled
4) Connect a Live Stream and Start Detection
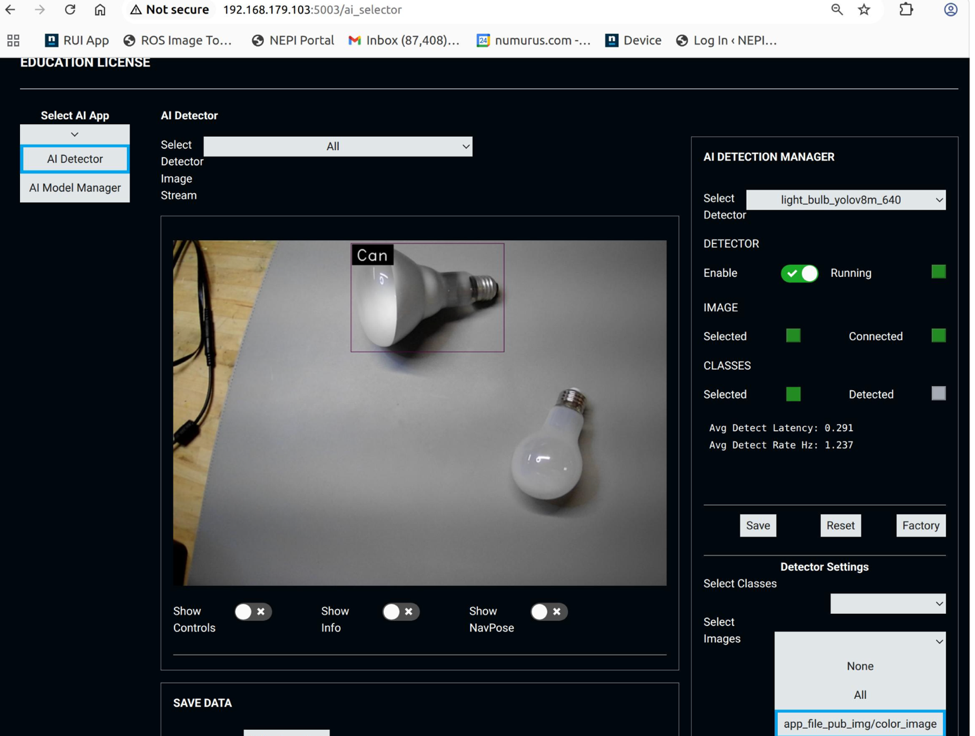
- Open the RUI AI System/AI Detector Manager page
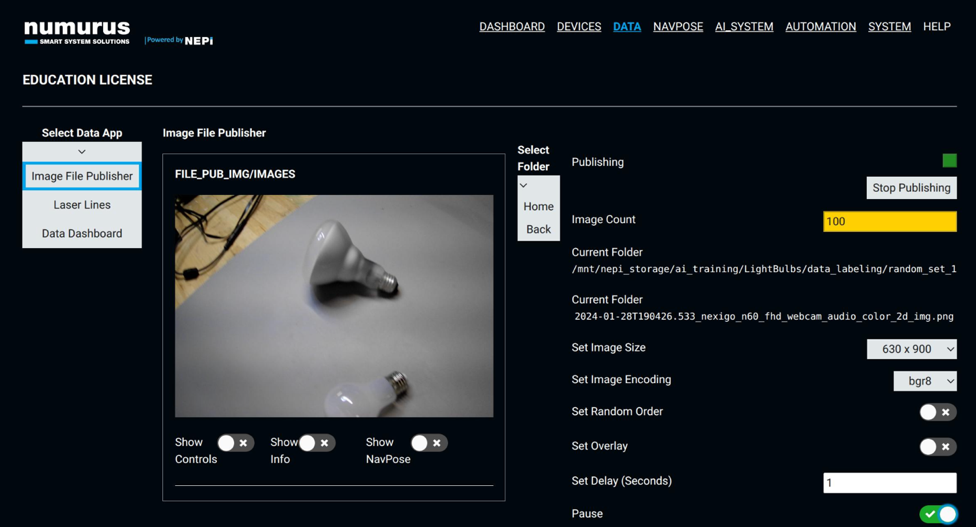
- Connect your live camera stream(s) or test using saved image/video files
- Enable the detector and observe performace
Retrain Model
You can improve model performance anytime by adding new data, adjusting settings, or tweaking labels.
1) Add new data to the project’s ‘raw_data’ folder
2) Update class labels in the ‘project_settings.yaml’ file
3) Change the base model to a smaller or larger model network in the ‘project_settings.yaml’ file
NOTE: After making any changes above, rerun the project initialization script:
sudo python initialize_project_yolo_detector.py
4) Add, remove, or adjust labeled boxes in your data labeling folder by re-running the label data script
NOTE: After making any changes above, rerun the data labeling script for any effected data folders :
sudo python label_data_yolo_detector.py
5) Retrain the model
NOTE: After making any changes above, rerun the model training script:
sudo python train_model_yolo_detector.py
6) Update the deploy model files
NOTE: After making any changes above, rerun the deploy model script:
sudo python deploy_model_yolo_detector.py
7) Deploy and Test your updated model following the instructions in the previous section
Pictures
