NEPI Engine – Configuring NTP Time Syncing
Introduction
This tutorial covers connecting and configuring an NTP server running on a locally network connected PC with a NEPI devices’ onboard time management system, which will automatically update your NEPI devices clock when both devices are connected on the network.
What you will need
1) 1x NEPI-enabled processor device and power supply.
2) 1x PC with Ethernet network adapter
3) 1x Ethernet Cable
Hardware Setup
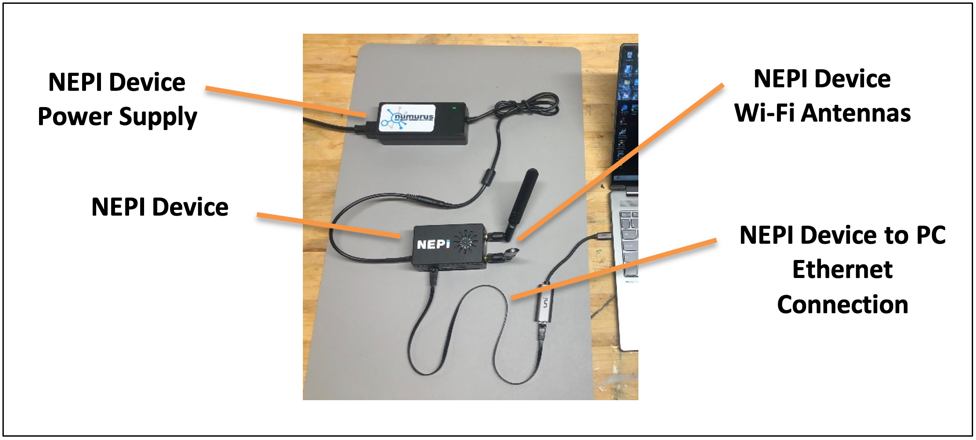
1) Connect the NEPI device to your PC’s Ethernet adapter using an Ethernet cable, then power your NEPI device.
PC Setup
Network Adapter Configuration
On the PC, you will need to configure the Ethernet network adapter with a static IPV4 address on the same subnet that your NEPI device following the steps below. The NEPI software uses a default subnet of 192.168.179.0/24 with the device configured for IP address 192.168.179.103.
Example: PC Network Adapter Settings
IP Address: 192.168.179.5
Submask 255.255.255.0
NTP Server Setup
On the PC, you will need to install and start an NTP Server. The process varies based on the operating system your PC is running as described below.
Linux Operating Systems
1) With your PC connected to the internet, open a terminal and run the following commands:
sudo apt-get install ntp
service ntp start
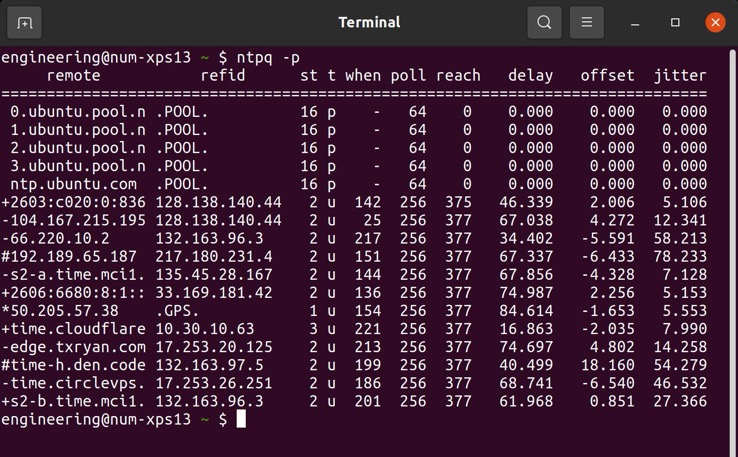
2) Check that the NTP server is running by typing
ntpq -p
You should see something like this
For additional information, take a look at: https://www.tekopolis.com/configuring-ntp-linux-client/
Windows Operating System
1) Instructions for setting up an NTP server on a Windows PC can be found at: https://support.hanwhavision.com/hc/en-us/articles/26570683589529-How-to-Setup-an-NTP-Server-on-Windows-10
NEPI Device Setup
By default, NEPI looks for and will connect to a local NTP server broadcasting on IP address 192.168.179.5.
Adding Additional NTP Connections
Additional NTP server IP addresses can be added or removed by publishing the IP address to the ROS topics “add_ntp_server” and “remove_ntp_server”.
1) To add an NTP server IP address to your NEPI device’s NTP search addresses, open an SSH connected terminal to your nepi device and enter the following commands:
rostopic pub /nepi/s2x/add_ntp_server std_msgs/String "data: 'IP_ADDRESS_TO_ADD'"
NOTE: If your NTP server is on a subnet other than “192.168.179”, you will need to add the NTP’s server’s subnet to your NEPI device’s IP addresses. See the “NEPI Ethernet Setup” section in “NEPI Engine – Connecting and Setup” tutorial for instructions on adding additional IP addresses to your NEPI device at: https://nepi.com/nepi-tutorials/nepi-engine-connecting-and-setup/
2) To remove an NTP server IP address to your NEPI device’s NTP search addresses, open an SSH connected terminal to your nepi device and enter the following commands:
rostopic pub /nepi/s2x/remove_ntp_server std_msgs/String "data: 'IP_ADDRESS_TO_REMOVE'"
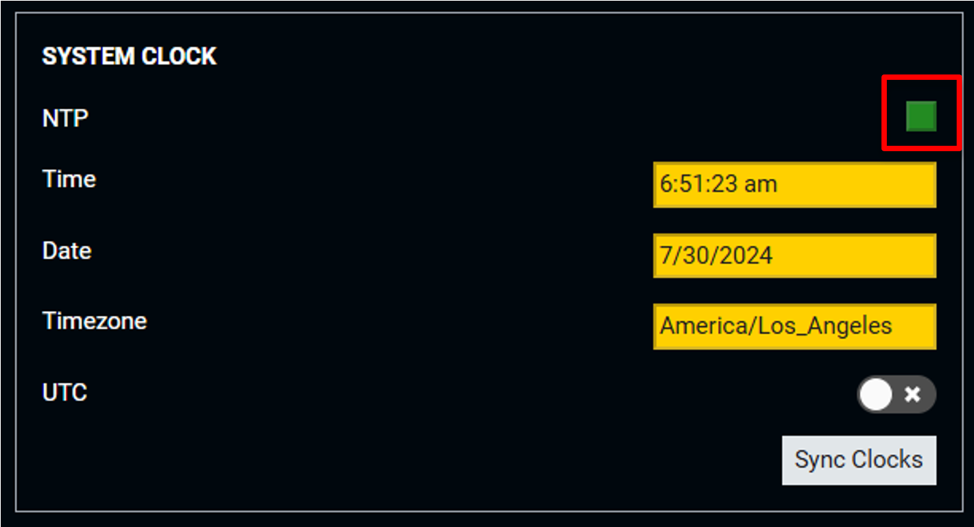
Check your NEPI NTP Connection
You can check that your NEPI device is connected to your PC’s NTP server by opening the NEPI device’s RUI Dashboard tab and verifying that the “NTP” indicator is green.
NOTE: It can take several seconds for the indicator to update after opening the RUI Dashboard tab.
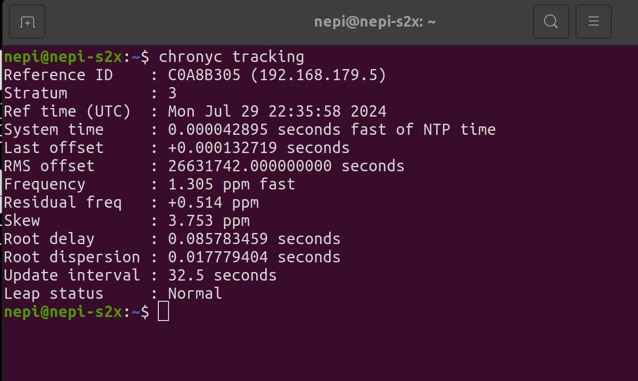
You can find additional information about your NEPI Device’s NTP connections by opening an SSH connected terminal to your NEPI device and typing:
chronyc tracking
You should see something like this.