NEPI Engine – User Storage Drive
Introduction
This tutorial covers connecting and working with your NEPI device’s network shared user storage drive configured on an NVIDIA Jetson or other edge-compute hardware. This tutorial assumes you have a working NEPI Engine enabled edge compute platform.
What you will need
1) 1x NEPI-enabled device. This tutorial uses an edge-compute processor box that includes an NVIDIA Jeston Xavier NX embedded GPU module with NEPI Engine software installed.
NOTE: See available off-the-shelf NEPI enabled edge-compute options at:
https://numurus.com/products-nepi-enabled-hardware/
2) 1x PC with Ethernet network adapter. This tutorial uses a Windows 11 PC and a USB GigE Ethernet adapter.
3) 1x Ethernet Cable
Hardware Setup
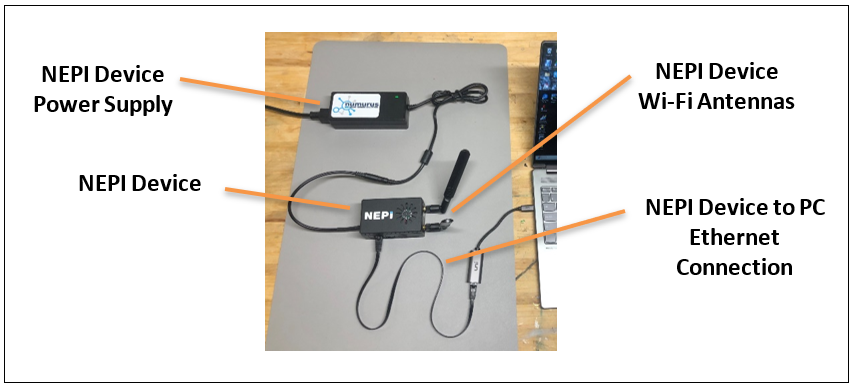
1) Connect the NEPI device to your PC’s Ethernet adapter using an Ethernet cable, then power your NEPI device.

Accessing the User Storage Drive
NEPI’s onboard user drive is where users can manage their saved data, AI models, automation scripts, databases, user configurations, and software. NEPI software also stores system and automation logs in this drive. This storage drive is made available as a shared network drive (i.e., Samba server) with the following credentials:
Username: nepi
Password: nepi
The following sections provide details for connecting to NEPI’s user storage drive for standard PC operating systems.
Linux Network Drive Access Setup
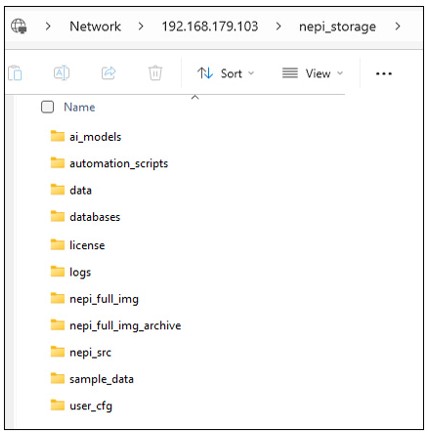
From the File Navigator, select + Other Locations. Enter the device URL as shown in the screenshot below, ensuring that you preface with smb:// (e.g., smb://192.168.179.103/)and substituting a different IP address if your device is configured with an IP address different than the default value. You will be presented with a login screen and need to provide the credentials as indicated above. After entering credentials, you should see the subdirectories listed above. You can drag/drop, copy/paste locally, or delete files.

Windows Network Drive Setup
Enter the system IP address and data folder in your file explorer window’s address bar (e.g., \\192.168.179.103\nepi_storage). You will be prompted for a username and password. After entering credentials, you should see the subdirectories listed above. You can drag/drop, copy/paste locally, or delete files.

Mac Network Drive Setup
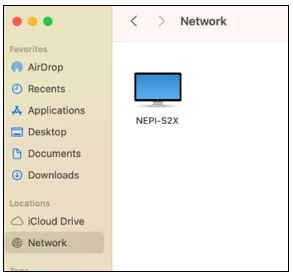
Open the Finder application and select the Network open on the left access bar. You should see you NEPI device listed. Click on the NEPI device and enter the username and password provided at the beginning of this section.

User Storage Drive Folders
Within this top level “nepi_storage” folder, you will find the following sub-folders:
NEPI User Storage Folder Descriptions
| Folder Name | Use Description |
| ai_models | AI image detection model library |
| automation_scripts | Automation script library |
| data | Onboard logged data folder |
| databases | Databases required for automation s |
| license | System license files and license request |
| logs | System generated logs are stored |
| nepi_full_img | Install (upgrading) system image files |
| nepi_full_img_archive | Archived (backup) system image files |
| nepi_src | NEPI source-code and other software installation files |
| sample_data | Data files used for testing and demonstrations |
| user_cfg | User and system configuration files |

