NEPI Engine – Customizing the NEPI RUI System
Introduction
This tutorial will walk you through customization of the NEPI Engine Resident User Interface System that would be useful for NEPI developers.
What you will need:
1) 1x NEPI-enabled device with internet access. This tutorial uses an edge-compute processor box that includes an NVIDIA Jetson Xavier NX embedded GPU with NEPI Engine software installed.
NOTE: See available off-the-shelf NEPI enabled edge-compute options at: https://numurus.com/products-nepi-enabled-hardware/
2) 1x PC with internet access and configured to access the NEPI device’s File System.
NOTE: Instructions for configuration a PC and connecting to a NEPI device’s File System are provided in the NEPI Engine – Getting Started – Accessing the NEPI File System tutorial at: https://nepi.com/nepi-tutorials/
Customizing and Compiling NEPI RUI
NEPI’s web-browser supported Resident User Interface system is built on JavaScript and React, a JavaScript-based UI development library. The RUI interacts with the NEPI ROS-based application system through a custom ROS-HTML Bridge Node that converts data back and forth between the two environments. All data and controls available on the RUI have a ROS based interface, and vice versa.
Cloning the NEPI Source-Code
a) Install Git on your Linux PC in not installed.
b) Create a user account on github and configure your ssh credentials if not already done following these instructions:
Connecting to GitHub with SSH – GitHub Docs
c) On your Linux PC with Git installed and ssh credentials configured and tested, open a terminal window and enter the following commands to clone the latest nepi_engine_ws and submodule source-code from the development branch:
NOTE: Replace “ros1_main” with “ros1_develop” in the “git checkout” line below if you want to checkout the development branch.
git clone git@github.com:nepi-engine/nepi_engine_ws.gitcd nepi_engine_wsgit checkout ros1_maingit submodule update --init --recursive
NOTE: The NEPI RUI source-code is located in the nepi_rui submodule repo at:
src/nepi_engine_ws/src/
Editing the NEPI RUI Source-Code
If you need to edit any of the NEPI repo’s submodules, follow the instructions below. Otherwise, jump to the “Deploying NEPI Source-Code to the Device” section below.
a) Change directories to the RUI repo submodule folder and checkout the “master ” branch for that repo by typing the following within the submodule folder:
cd src/nepi_engine_ws/src/
git checkout master
b) Make any changes to the source-code you want to make and save the changed files.
Deploying NEPI RUI Updates
NOTE: The following section assumes your NEPI device’s bash env is configured with the shortcut aliases suggested earlier in this tutorial. Alternatively, you can find more detailed instructions for cloning NEPI Engine GitHub source-code repos, see the NEPI Engine – Software File System manual at:
https://nepi.com/documentation/nepi-engine-nepi-file-system/
a) Change back to the nepi_engine_ws base repo folder.
b) Setup your Linux PC environment to access the NEPI device’s file system. You can find an example set of environment variables and values in the sample_deploy_env_vars.sh script in the same directory, which you can copy and edit for your custom setup and source, or simply add valid definitions for these environment variables directly to your ~/.bashrc.
sudo vi ~/.bash_aliases
c) Deploy the source code to the NEPI device using the deploy_nepi_engine_source.sh script in nepi_engine_ws.
./deploy_nepi_engine_source.sh
d) Open an SSH terminal to your NEPI device and run the following commands:
ruibld
NOTE: NEPI default sudo password is “nepi”
Testing RUI Changes
If the build was successful with no errors, refresh the NEPI RUI in your browsers
Editing the RUI
Configuring the RUI Menu
You can modify the RUI’s top menu by following these instructions:
1) Open the App.js menu file from the cloned nepi_rui repo on you
cd <Your Git Code Folder>/nepi_base_ws/src/nepi_rui/src/rui_webserver/rui-app/src
vi App.js
2) Edit the menu, save, and exit
Changing the RUI Logo Image
You can update the logo shown at the top-left of the RUI screen using the following instructions:

1) Create a logo with the correct aspect ratio
Logo (1004×254): ~4:1
2) Convert your PNG/JPG image to webp format. Many browser-based web tools can do this. E.g., https://cloudconvert.com/webp-converter
3) Change the logo file on the device to your new webp-formatted file(s) in the cloned source-code repo on your PC.
<Your Git Code Folder>/nepi_base_ws/src/nepi_rui/src/rui_webserver/rui-app/src/logos/logo.webp
Editing or Creating RUI Tabs
Each tab in the RUI web application is management by its own “.js” file (i.e. Dashbard.js). Within these js page files, the page is defined by a combination of JavaScript/react layout directives and mappings to NEPI ROS topics and services defined by the NEPI back-end codebase (see next section).
Example:
renderSaveData() {
const { onToggleSaveData, systemStatusDiskRate, deleteAllData } = this.props.ros
return (
<Section title={"Save Data"}>
<Label title={"Save Data"}>
<Toggle id={"toggle_save_data"} onClick={onToggleSaveData} />
Where the RUI DASHBOARD tab’s “Save Data” section is defined by the “renderSaveData()” function, which maps the “onClick” js variable to the ROS-bridge mapped “onToggleSaveData” service, which connects to the NEPI ROS “/nepi/s2x/save_data” system control topic.
Editing or Creating RUI-ROS Interfaces
The RUI interfaces with the NEPI Engine ROS processes through a ROS to JSON and ROS to HTML bridge. These bridge data and control mappings are located in the file:
<Your Git Code Folder>/nepi_base_ws/src/nepi_rui/src/rui_webserver/rui-app/src/Store.js
You can edit or add new RUI-ROS bridge interfaces within this file. Some examples are provided in the following sections.
Adding Controls
Toggle Control
For our Toggle Control tutorial, we will be adding a toggle control to the RUI Sensors/Imaging tab that turns IDX auto adjustment on and off. This process will:
– Hide or unhide the toggle switch control based on the value of the “has_auto_adjustment” value in the sensor’s “IDXCapabilitiesQuery” ROS published service call. This capability component is a Boolean data type.
– Updates the toggle’s state based on the value returned in the “auto” sensor’s “IDXStatus” ROS published topic message. This status component is a Boolean data type.
– Send new value on state change to the sensor’s “idx/set_auto_adjust” ROS subscriber topic. This topic accepts a Boolean data type.
Instructions:
1) First, we need to define a function that maps from the RUI js environment back to our NEPI ROS “set_auto_adjust” control ROS topic in the repo’s “Store.js” file. We will use the name “setIdxAutoAdjust” as our function name..
a) Open the “Store.js” file located in the NEPI Engine “nepi_ws_base” repo folder at:
“nepi_engine_ws\src\nepi_rui\src\rui_webserver\rui-app”
b) Define and bind the “setIdxAutoAdjustment” function to the sensor node’s “idx/auto_adjust” subscriber topic. This topic takes a Boolean type.
@action.bound
setIdxAutoAdjust(idxSensorNamespace,auto_adjust) {
this.publishMessage({
name: idxSensorNamespace + "/idx/set_auto_adjust",
messageType: "std_msgs/Bool",
data: {'data':auto_adjust},
noPrefix: true
})
}

2) Next, add the new toggle control to the RUI’s existing Sensors/Imaging tab:
a) Open the “NepiSensorsImagingControls.js” file located in the NEPI Engine “nepi_ws_base” repo folder at:
“nepi_engine_ws\src\nepi_rui\src\rui_webserver\rui-app”
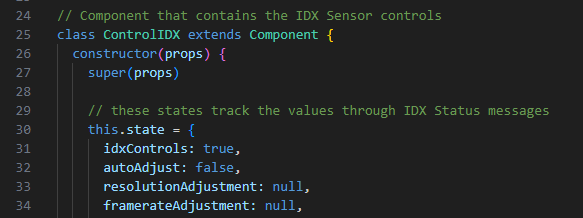
b) Define and initialize a new local state variable to map the IDXStatus “auto” component to in the “this.state = “ declaration. (assuming it is not already there). You can also initialize the state value, or assign “null”.

c) Map the IDXStatus “auto” status component to our newly created state variable in the component to the state component in the “this.setState“ function declaration (assuming it is not already there).

d) Next, we want to add a link to the new “setAutoAdjust” function we created in the Store.js file by adding a the function name using a “const” declaration in the “render” section we want to use the function in. The Store.js file is linked through the class’s ” this.props.ros” property, so we will add it to that list.

e) ) Add a toggle switch declaration in the page’s “render” section that updates the toggle state “checked” state based on the current value of the “autoAdjust” state variable we added to the class’s state property, and connect the “onClick” with a lamda function to the “setAutoAdjust” function we defined that passes the oppisite value of the toggle’s current “checked” state.
<Label title={"Auto Adjust"}>
<Toggle
checked={this.state.autoAdjust}
onClick={() => setIdxAutoAdjust(this.props.idxSensorNamespace,!this.state.autoAdjust)}
/>
</Label>

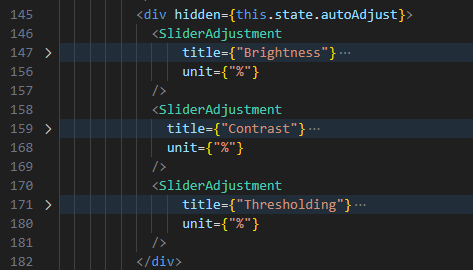
e) Finally, we want to hide the “Brightess, Contrast, and Threshold” controls when the “autoAdjust” state is “True” by adding a “<div>” section around those controls and use the div’s “hidden” property.
<div hidden={this.state.autoAdjust }>
…
</div>

3) Save your files, deploy to your system, and rebuild the RUI following the instructions in “Rebuilding Front-End Changes” section of this tutorial.
Button Control
For our Button Control tutorial, we will be adding a button control to the RUI Sensors/Imaging tab that resets the sensor’s control’s when pressed and released. This process will:
– Send and ROS “Empty” message to the sensor’s “idx/reset_controls” ROS subscriber topic.
Instructions:
1) First, we need to define a function that maps from the RUI js environment back to our NEPI ROS “reset_control” ROS topic in the repo’s “Store.js” file. We will use the name “IdxSettingsResetTriggered” as our function name..
a) Open the “Store.js” file located in the NEPI Engine “nepi_ws_base” repo folder at:
“nepi_engine_ws\src\nepi_rui\src\rui_webserver\rui-app”
b) Define and bind the “setIdxAutoAdjustment” function to the sensor node’s “idx/auto_adjust” subscriber topic. This topic takes a Boolean type.
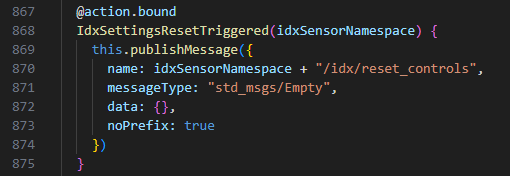
@action.bound
IdxSettingsResetTriggered(idxSensorNamespace) {
this.publishMessage({
name: idxSensorNamespace + "/idx/reset_controls",
messageType: "std_msgs/Empty",
data: {},
noPrefix: true
})
}

2) Next, add the new button control to the RUI’s existing Sensors/Imaging tab:
a) Open the “NepiSensorsImaging.js” file located in the NEPI Engine “nepi_ws_base” repo folder at:
“nepi_engine_ws\src\nepi_rui\src\rui_webserver\rui-app”
b) Add a link to the new “IdxSettingsResetTriggered” function we created in the Store.js file by adding a the function name using a “const” declaration in the “render” section we want to use the function in. The Store.js file is linked through the class’s ” this.props.ros” property, so we will add it to that list.

c) Add a button declaration in the page’s “render” section that uses a lamda function call in the “onClick” property to the “IdxSettingsResetTriggered” function we defined, and give the button a label “Reset Sensor”.
<ButtonMenu>
<Button onClick={() => IdxSettingsResetTriggered(this.state.currentIDXNamespace)}>{"Reset Settings"}</Button>
</ButtonMenu>

3) Save your files, deploy to your system, and rebuild the RUI following the instructions in “Rebuilding Front-End Changes” section of this tutorial.
Rebuilding Front-End Changes
For detailed instructions on rebuilding and deploying any changes to the NEPI RUI system, see the NEPI Engine – User Interface System manual at:
https://nepi.com/documentation/nepi-engine-user-interface-system/

